Jul 30, 2010

Crockpot Pulled Chicken

Crockpots are a wonderful invention – they are not only great in the winter for a hearty meal – they are also great for really hot summer days when you don’t want to heat up your kitchen.   And in Buffalo, we had a week or so of really hot and humid weather recently (much like the rest of the country!).  So this was the perfect meal for that occasion – I combined all of the sauce ingredients together the night before and had the chicken in the crockpot in the fridge.  Before I went to work – I mixed the sauce and chicken and set it on low for the day.  When I came home – it was so tender all I had to use was a pair of tongs to shred the chicken.   I served it with a simple salad and a glass of pink lemonade – perfect summer meal.   I love this recipe – definitely going to become a favorite in this house.  We even had leftovers the next day on top of a salad with some guacamole and salsa to mix things up a little :)  Enjoy

Ingredients

  • 1 (15 oz.) can tomato sauce
  • 3 chipotles in adobo, finely minced, and 2 tsp. adobo sauce
  • 1/4 cup cider vinegar
  • 3 to 4 Tbsp. honey
  • 1.5 Tbsp. smoked paprika
  • 2 Tbsp. tomato paste
  • 2 Tbsp. Worcestershire sauce
  • 1 Tbsp. dry mustard
  • 1 tsp. kosher salt
  • 1/2 tsp. cayenne pepper
  • 2 tsp. chili powder
  • 3 lbs. boneless/skinless chicken thighs and breasts (I used 2 lbs. breast 1 lb. thigh meat)
  • 1 large onion, roughly chopped
  • 4 cloves garlic, minced

Directions

1. Whisk together the first 9 ingredients (tomato sauce through chili powder).  [If not using right away – cover and keep in refrigerator]

2. Spray your crockpot liner lightly with oil and then place the chicken inside. Season the chicken with salt and pepper. 

3. Scatter the onions and garlic evenly over the top.  [Set chicken aside in refrigerator until ready to cook.]

4. Pour the barbecue sauce over the top of chicken and stir to combine. Cook on low for 5 –6 hours, until tender.  Shred the chicken with two forks and, if desired, continue to cook for a little bit with the lid off to allow mixture to thicken.

Source Elly Says Opa who adapted from Apple a Day

Printer-friendly version

Jul 29, 2010

Summer Vegetable Skillet Lasagna

This is a great seasonal version of one of my favorite meals, skillet lasagna.  It is a very similar recipe except with summer squash replacing the beef.   It is healthy, flavorful and so easy to pull together - perfect summertime weeknight meal.   Topped with some fresh basil picked from my herb garden – it is perfect! Enjoy!  

Ingredients

  • 2 Tbsp. extra virgin olive oil
  • 1 yellow onion, chopped fine
  • 4 garlic cloves, minced
  • 1 (28-oz.) can diced tomatoes
  • salt and pepper
  • 10 curly-edged lasagna noodles, broken into 2-inch lengths
  • 1 small zucchini, cut into 1/2 inch chunks
  • 1 small yellow squash, cut into 1/2 inch chunks
  • 1/4 cup shredded fresh basil
  • 1 cup ricotta cheese

Directions

1. Heat oil in a large skillet over medium high heat until shimmering.  Add onion and cook until softened, about 3 minutes.  Add garlic and cook until fragrant, about 30 seconds.

2. Drain tomatoes, reserving liquid.  Add water to tomato liquid to make 2 cups. Add liquid and 1 tsp. salt to skillet.

3. Scatter noodles into skillet and layer tomatoes over noodles and bring to a simmer. 

4. Reduce heat to medium and cook, covered, stirring occasionally (very important or the noodles will stick) for about 10 minutes.

5. Stir in zucchini and squash, cook until noodles and squash are tender, about 8 minutes.

6. Add basil and half of cheese to noodles, stirring until sauce is creamy.  Dollop remaining cheese over the noodles and season with salt and pepper. 

Source: America’s Test Kitchen 30-Minute Summers

Printer-friendly version

Jul 28, 2010

Wagon Wheel Taco Pasta Salad

If you need a dish to bring to a party – look no further than this recipe.  It is the perfect pasta salad that is sure to please a crowd.  It is healthy, fulfilling and absolutely delicious.   It is a combination of Mexican flavors – including cilantro, corn, black beans, salsa, avocado and a flavorful mix of lime juice, olive oil and spices.  I only made one slight addition to this recipe and that was adding some sliced black olives – but if you don’t like them you can definitely omit them. Also, this recipe makes a lot – so if you are not feeding a crowd – you should definitely halve it. 

It was definitely a winner with my family (Hi Aunt Marilyn – I know you wanted this recipe! :) ) – and I know why it is so popular with other food bloggers – you must make this dish!!   Enjoy!

Ingredients

  • 1 lb. wagon wheel pasta
  • 1 15 oz. can black beans, drained and rinsed
  • 1 10 oz. package frozen corn
  • 2 medium tomatoes, seeded and diced
  • 8 oz. shredded Mexican-blend cheese
  • 1 1/2 cups salsa
  • 1/2 cup. sliced black olives
  • 1/2 cup olive oil
  • 3-4 tbsp lime juice
  • 1 tbsp cumin
  • 1-2 tsp chili powder
  • 2 garlic cloves, minced
  • freshly ground salt & pepper
  • 1/2 cup chopped fresh cilantro
  • 1 avocado, diced

Directions

1. Cook the pasta al dente according to package directions. Drain and rinse with cold water.

2. In a large bowl (4 quart), combine the black beans, corn, tomatoes, salsa, olives and cheese. Add the cooled pasta and mix well.

3. In another bowl, whisk together the olive oil, lime juice, garlic, cumin and chili powder. Pour over the pasta salad, add the cilantro, and mix well. Season to taste with salt & pepper. Just before serving, dice the avocado and stir into salad.

Source: Cara’s Cravings

Printer-friendly version

Jul 27, 2010

Daring Bakers: Swiss Swirl Ice Cream Cake

The July 2010 Daring Bakers’ challenge was hosted by Sunita of Sunita’s world – life and food. Sunita challenged everyone to make an ice-cream filled Swiss roll that’s then used to make a bombe with hot fudge. Her recipe is based on an ice cream cake recipe from Taste of Home.
Isn’t this such a fun challenge!  It is perfect for a birthday cake too (although I didn’t make it for a birthday – I made it for just us – but I would definitely make it for someone's birthday in the future).  :)  The challenge entailed making a chocolate swiss roll filled with whipped cream, then sliced and lined in a bowl.  And filled with a layer of homemade ice cream, homemade hot fudge sauce and more ice cream.   Does it get much better than that? 
I used my favorite vanilla ice cream, with half mixed with crushed oreos and the other half left plain.  The cookies and cream went perfectly with the swiss rolls and the hot fudge.  Yum – this was good.  It started to melt quickly when I cut it – so if you are serving this to a large group you might want to chill your plates first.  
I also halved the original recipe – and it fit perfectly in my 1.5 qt. glass pyrex bowl.  The recipe below reflects that change – so if you need more of this just double it. 
I had lots of fun with this months challenge – and the best part is that there is more of this in my freezer to enjoy after I finish writing this post!  :)
Visit the Daring Bakers Blogroll to see what other creative swiss swirl ice cream cakes were created!

Ingredients

swiss roll cake:

  • 3 eggs
  • 1/2 cup caster sugar + extra for rolling
  • 3 Tbsp. all purpose flour
  • 2.5 Tbsp. unsweetened cocoa powder
  • 1 Tbsp. boiling water
  • a little oil for brushing the pans

Swiss roll filling:

  • 1 cup whipping cream
  • 1 tsp. vanilla extract
  • 2.5 Tbsp. caster sugar

Ice Cream (any two types you want) I used 1 batch Vanilla Bean (1/2 mixed with Oreos)

fudge sauce:

  • 1/2 cup caster sugar
  • 1.5 Tbsp. unsweetened cocoa powder
  • 1 Tbsp. cornstarch
  • 3/4 cup water
  • 1/2 Tbsp. butter
  • 1/2 tsp. vanilla extract

Directions

for the swiss roll cake:

1. Pre heat the oven to 400 deg F.

2. Brush the a 9 x 11 inch baking pan with a little oil and line with parchment paper.

3. In a large mixing bowl, add the eggs and sugar and beat till very thick; when the beaters are lifted, it should leave a trail on the surface for at least 10 seconds.

4. Sift together the flour and cocoa into the egg/sugar mixture. Fold in gently with a spatula. Fold in the water.

5. Spread the mixture out evenly into the corners of the pans.

6. Place a pan in the center of the oven and bake for about 10-12 minutes or till the centre is springy to the touch.

7. Spread a kitchen towel on the counter and sprinkle a little caster sugar over it.
Turn the cake on to the towel and peel away the baking paper. Trim any crisp edges.

8. Starting from one of the shorter sides, start to make a roll with the towel going inside. Cool the wrapped roll on a rack, seam side down.

for the swiss roll filling:

1. In the bowl of a stand mixer with the whisk attachment, combine cream, sugar and vanilla and whip until thickened.

2. Open the rolls and spread the cream mixture, making sure it does not go right to the edges (a border of ½ an inch should be fine).

3. Roll the cakes up again, this time without the towel. Wrap in plastic wrap and chill in the fridge till needed, seam side down.

For the hot fudge sauce:

1. In a small saucepan, whisk together the sugar, cocoa powder, cornstarch and water.

2. Place the pan over heat, and stir constantly, till it begins to thicken and is smooth (for about 2 minutes).

3. Remove from heat and mix in the butter and vanilla. Set aside to cool.

To assemble the cake:

1. Cut the Swiss rolls into 20 equal slices (approximately 2 cm. each)

2. Cover the bottom and sides of the bowl in which you are going to set the dessert with plastic wrap.

3. Arrange two slices at the bottom of the pan, with their seam sides facing each other. Arrange the Swiss roll slices up the bowl, with the seam sides facing away from the bottom, to cover the sides of the bowl. Cover the bowl with plastic wrap and freeze till the slices are firm (at least 30 minutes).

4. Soften half of the ice cream. Take the bowl out of the freezer, remove the cling film cover and add the ice cream on top of the cake slices. Spread it out to cover the bottom and sides of the bowl. Cover the bowl with plastic wrap and freeze till firm ( at least 1 hour).

5. Add the fudge sauce over the vanilla ice cream, cover and freeze till firm. (at least an hour)

6. Soften the other half of ice cream and spread it over the fudge sauce. Cover with plastic wrap and freeze for at least 4-5 hours till completely set .

7. Remove the plastic cover, and place the serving plate on top of the bowl. Turn it upside down and remove the bowl and the plastic lining. If the bowl does not come away easily, wipe the outsides of the bowl with a kitchen towel dampened with hot water. The bowl will come away easily.

Source: Sunita's world who was inspired by Taste of Home

Printer-friendly version

Jul 26, 2010

Lemon Meringue Cupcakes

Could these cupcakes be any more adorable?  I really don’t think so! They are a lemon flavored cupcake, topped with lemon curd and then meringue icing on top, finished with a kitchen torch to give that nice brown top.  They are definitely for a lemon lover – but they are wonderful and so much fun to eat. 
I made a few changes to the original recipe – which is from Martha Stewart Cupcakes, I used Martha’s recipe for the cake and frosting, and Dorie Greenspans recipe for the lemon curd.  I did not need even half of the frosting to frost all 24 of these cupcakes – so I adjusted the recipe below to reflect that.  You also may have some lemon curd leftover – but you can easily find another reason to eat that (i.e. straight from the bowl with a spoon).  Another item to note – be very careful if travelling with these – the frosting can easily slide off the lemon curd – so don’t make any quick turns! :)
 

Ingredients

cupcakes:

  • 3 cups all-purpose flour
  • 1 Tbsp. baking powder
  • 1/2 tsp. salt
  • 1 cup (2 sticks) unsalted butter, room temperature
  • 2 cups sugar
  • 4 large eggs, room temperature
  • Finely grated zest of 3 lemons (about 3 tablespoons), plus 2 tablespoons fresh squeezed lemon juice
  • 1 tsp. pure vanilla extract
  • 1 cup buttermilk

lemon curd:

  • 1 1/4 cups sugar
  • 6 Tbsp. (3/4 stick) unsalted butter, ,cut into 6 pieces
  • 1 large egg
  • 6 large egg yolks
  • Freshly squeezed juice of 4 lemons

frosting (Seven minute frosting):

  • 3/4 cups plus 1 tablespoons sugar
  • 1/3 cup water
  • 1 Tbsp. light corn syrup
  • 3 large egg whites, room temperature

Directions

cupcakes:

1. Preheat oven to 325 degrees. Line 24 standard muffin tins with paper liners.

2. Whisk together flour, baking powder, and salt.

3. With an electric mixer on medium-high speed, cream butter and sugar until pale and fluffy.

4. Add eggs, one at a time, beating until each is until incorporated, scraping down sides of bowl as needed. Beat in zest and vanilla.

5. Add flour mixture in three batches, alternating with two additions of buttermilk and lemon juice, and beating until just combined after each.

6. Divide batter evenly among lined cups, filling each three-quarters full. Bake, rotating tins halfway through, until golden brown and a cake tester inserted in centers comes out clean, about 25 minutes.

7. Transfer tins to wire racks to cool completely before removing cupcakes. Cupcakes can be stored overnight at room temperature, or frozen up to 2 months, in airtight containers.

lemon curd:

1. Place all lemon curd ingredients in a medium heavy-bottomed saucepan and stir with a spatula to moisten sugar. 

2. Place over medium-low heat and cook, stirring continuously until the butter melts and the mixture thickens like custard, 4-10 minutes. 

3. It is cooked enough when you can run your finger along the spatula and the curd does not run back along the track you created.  Pour through a fine mesh strainer into a heatproof bowl.   Cool to room temperature before storing in the refrigerator – place plastic wrap on surface to create an airtight seal.

seven minute frosting:

1. Combine 3/4 cups sugar with the water and corn syrup in a small saucepan; clip a candy thermometer to side of pan. Bring to a boil over medium heat, stirring occasionally, until sugar dissolves. Continue boiling, without stirring, until syrup reaches 230 degrees.

2. Meanwhile, in the bowl of a standing electric mixer fitted with the whisk attachment, whisk egg whites on medium-high speed until soft peaks form. With mixer running, add remaining 1 tablespoon sugar, beating to combine.

3. As soon as sugar syrup reaches 230 degrees, remove from heat. With mixer on medium-low speed, pour syrup down side of bowl in a slow, steady stream.

4. Raise speed to medium-high; whisk until mixture is completely cool (test by touching the bottom of the bowl) and stiff (but not dry) peaks form, about 7 minutes. Use immediately.

To assemble cupcakes:

Spread about 1 tablespoon lemon curd onto middle of each cupcake. Fill a pastry bag fitted with a large open-star tip with frosting. Pipe frosting onto each cupcake, swirling tip slightly and releasing as you pull up to form a peak. Hold a small kitchen torch 3 to 4 inches from surface of frosting, and wave it back and forth until frosting is lightly browned all over. Serve immediately.

Source: cupcakes and frosting: Martha Stewart Cupcakes; lemon curd from Baking from my home to yours by Dorie Greenspan

Printer-friendly version

Jul 23, 2010

Pizza San Vito

This is my take on one of my absolute favorite pizzas that we order at a local Italian restaurant.  I still had half a batch of pizza dough in my freezer from the last time I grilled pizza – so I thought I would try something different.  The only change with this pizza, since I cooked the crust directly on the grill, was that I finished this in the oven so that I could broil the top and get the cheese nice and brown and bubbly!   I have a feeling I will make this version all year round – so it definitely doesn’t need to be grilled.  Enjoy!
Ingredients
(makes 2 pizzas the size above)

  • 1/2 batch of pizza dough
  • 1/2 batch of pizza sauce
  • 8 oz. fresh mozzarella, sliced thin
  • 10-15 kalamata olives, pitted and sliced in half
  • 8 marinated artichoke hearts, quartered
  • 4-6 slices of sopprasseta salami, sliced into strips
  • 6-8 fresh basil leaves, sliced in thin strips
  • salt and pepper, to taste

Directions
If making on the grill – cook the dough on each side on a medium grill until cooked through, then assemble pizza ingredients and finish in the oven on a low broiler until cheese is bubbly and brown.
If making in the oven, assemble pizza and cook on a pizza stone in a preheated 500 degree oven for 10-14 minutes.   
Source: inspired by Romeo and Juliet’s

Jul 22, 2010

Grilled Buffalo Chicken Salad

I love this take on a salad – what doesn’t go better than chicken, blue cheese and hot sauce!   The original recipe calls for a homemade blue cheese dressing – but I already had some good store bought dressing in my fridge, so I used that to make this an even easier meal.  It was so delicious – enjoy!
 

Ingredients

  • 1/4 cup crumbled blue cheese
  • 1 carrot, peeled and sliced
  • 3 celery ribs, sliced thin
  • romaine lettuce, rinsed and chopped
  • 1/4 cup hot sauce (such as Frank’s Red Hot)
  • 2 Tbsp. unsalted butter, melted
  • 2 boneless, skinless chicken breasts
  • Blue cheese salad dressing, for serving

Directions

1. Combine hot sauce and melted butter in a small bowl.

2. Pour half of hot sauce/butter mixture on chicken and reserve the other half of sauce.

3. Grill chicken over a hot fire until it registers 160 degrees F. Transfer to a platter and brush with reserved hot sauce.

4. Combine lettuce, celery, carrots and blue cheese crumbles into two dinner plates.  Slice chicken breasts and serve on top of salad and pass blue cheese dressing.

Source: adapted from America’s Test Kitchen 30-Minute Suppers

Printer-friendly version

Jul 21, 2010

Summer Squash Risotto

Way back in January I mentioned that I went to a Tyler Florence book signing at a local grocery store.  Well, this is the first recipe that I’ve tried out of the book.   It was a really flavorful meal and fun to make.   I also loved that I got to use some fresh sage from my herb garden – and I don’t have a ton of recipes that use fresh sage (any suggestions out there?).  Even though there are a few steps to this meal, it actually was pretty easy to make.  While the squash is roasting in the oven,  you quickly fry the sage in the oil that you then use to make the risotto.  Perfect summer meal and filling enough for dinner!  Enjoy!

Perfect meal served with one of our favorite local wines – Casa Larga Lilac hill

Ingredients

  • 2 yellow squash
  • 2 zucchini
  • 2 pattypan squash (I couldn’t find so I omitted)
  • 1 yellow onion
  • 2 sprigs of fresh thyme
  • extra-virgin olive oil
  • kosher salt and black pepper

risotto:

  • extra virgin olive oil
  • fresh sage leaves – 6-8
  • 1/2 medium yellow onion, diced
  • 1 cup Arborio rice
  • 1 1/2 cups white wine (or vermouth)
  • 1 quart reduced-sodium vegetable broth
  • 2 Tbsp. unsalted butter
  • 1/2 cup grated Parmesan cheese
  • kosher salt and pepper

Directions

1. Preheat oven to 350 degrees.  Cut squash and zucchini into circles and slice onion into rings.

2. Place on roasting pan and scatter thyme leaves over the top.  Drizzle with olive oil and season with salt and pepper. 

3. Roast for 15 - 20 minutes, until golden brown.

4. While the vegetables roast, begin the risotto. Heat a few Tbsp. of olive oil in a large, heavy bottomed dutch oven.   Fry the sage leaves until they are crispy.  Place on paper towels and set aside.

5. Add onion to the pot and sauté until fragrant and slightly translucent.

6. Add rice to the pot and stir with a wooden spoon for about 2-3 minutes. 

7. Add wine and cook until almost evaporated, stirring frequently.

8. Add vegetable broth, a little at a time, allowing the rice to absorb the broth between each addition.  Continue to cook until rice is al dente. 

9. To finish, add butter and parmesan cheese.  Season with salt and pepper and serve with roasted vegetables on top and fried sage leaves. 

Source: Dinner at My Place by Tyler Florence

Printer-friendly version

Jul 20, 2010

Persian Chicken Kabobs

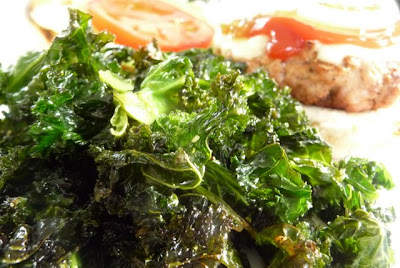
This is a super easy grilled chicken kabob recipe and very tasty.  I served it with some wild rice and kale chips.  Quick, easy and delicious – can’t ask for much more on a summer weeknight!  We ate this outside in our sunroom too! 

Ingredients

  • 1/2 yellow onion
  • 1/4 cup fresh squeezed lemon juice
  • 1 Tbsp. dried oregano
  • 1 tsp. sweet paprika
  • 1 garlic clove
  • 1/2 cup extra-virgin olive oil
  • 1 lb. boneless, skinless chicken tenders

Directions

1. In the bowl of a food processor, puree the onion, lemon juice, oregano, paprika and garlic.  Slowly add the olive oil, with the motor running.

2. Place the chicken and the marinade in a large, resealable plastic bag.  Marinate for 30 minutes at room temperature. 

3. Preheat the grill on high for about 15 minutes. 

4. Remove the chicken from the marinade and thread on skewers. Discard the remaining marinade. 

5. Brush the grill grates clean, and grill the kabobs over medium heat with the lid closed.  Cook for 8 – 10 minutes, turning once. 

Source: adapted from Webers Way to Grill

Printer-friendly version

Jul 19, 2010

Slush Cake


My sister asked me to make this slush cake for a party recently.  She gave me the recipe that consisted of a simple flour/nut/butter crust, two packages of instant chocolate pudding and cool whip.  And since I don’t like to use convenience products like instant pudding and cool whip in my baked goods – I decided to my make own homemade version of this.   I set out to find a simpler chocolate pudding recipe – since the one I previously posted is just a bit too much work.  Luckily, I found the perfect recipe at Smitten Kitchen.  It was fantastic and so easy – no food processor involved!   Then I just had to make my own whipped cream – which is just a simple whipped heavy cream and powdered sugar.  This brought the traditional convenience version of slush cake to an entirely new level.  It was so good – and if you make all of the components in advance – this is even easier.  Enjoy!

Ingredients

note: assemble the slush cake in this order, but to make in advance, make the crust and pudding ahead of time.  Then make the whipped cream layers and assemble. 

crust layer:

  • 12 Tbsp. (1 1/2 sticks) unsalted butter
  • 1 1/2 cups. all-purpose flour
  • 3/4 cups chopped walnuts

bottom cream layer:

  • 1 cup cold heavy cream
  • 8 ounces cream cheese, softened
  • 1/3 cup granulated sugar
  • 1 tsp. vanilla extract

pudding:

  • 1/4 cup cornstarch
  • 1/2 cup sugar
  • 1/8 teaspoon salt
  • 3 cups whole milk
  • 6 ounces 62% semisweet chocolate, coarsely chopped (I used good quality semisweet chocolate chips)
  • 1 teaspoon pure vanilla extract

top whipped cream layer:

  • 1 1/2 cups cold heavy cream
  • 2 Tbsp. powdered sugar
  • 1/2 cup chopped walnuts

Directions

to make the crust:

1. Preheat oven to 350 degrees F. Using a pastry blender or your fingers, combine butter and flour until it resembles coarse crumbs.  Mix in chopped nuts.

2. Press in the bottom of a 9 x 13 inch baking pan. Bake for 20 minutes or until lightly golden brown.  Let cool.

to make pudding:

1. Combine the cornstarch, sugar and salt in the top of a double boiler. Slowly whisk in the milk, scraping the bottom and sides with a heatproof spatula to incorporate the dry ingredients.

2. Place over gently simmering water and stir occasionally, scraping the bottom and sides. Use a whisk as necessary should lumps begin to form.

3. After 15 to 20 minutes, when the mixture begins to thicken and coats the back of the spoon, add the chocolate. Continue stirring for about 2 to 4 minutes, or until the pudding is smooth and thickened.

4. Remove from the heat and stir in the vanilla.

5. Place into a bowl and press plastic wrap directly on top.

6. Refrigerate for at least 30 minutes and up to 3 days, until ready to assemble cake.

to make bottom cream layer:

1. In the chilled bowl of a standing mixer fitted with the whisk attachment, beat 1 cup cream on medium speed.  When the cream is frothy, increase the speed to high and whip until the cream holds firm peaks.

2. In a separate large bowl (or the bowl of a standing mixer fitted with the paddle attachment), beat the cream cheese on medium speed until it’s soft and creamy. Add the sugar and vanilla and continue beating until combined.

3. Fold about 1/3 of the whipped cream into the cream cheese to lighten the mixture, then add the remaining cream and continue folding until it’s incorporated.

to make top whipped layer:

1. Combine cream and powdered sugar in the chilled bowl of the stand mixer and with the whisk attachment, beat on medium speed for 1 minute.  When frothy, increase speed to high and whip until the cream holds firm peaks.

to assemble:

Spread cream cheese/whipped cream mixture over the baked crust.  Top with the chocolate pudding and then the whipped cream.  Sprinkle chopped nuts on top.  Refrigerate until ready to serve. 

Source: My sister, pudding from Smitten Kitchen and Cream cheese layer from this post.

Printer-friendly version

Jul 15, 2010

Kale Chips

I started reading Kath Eats about a year or so ago, and I find her blog to be very intriguing and inspiring.  I love seeing everything she eats.  If you don’t know what I mean – check her out.  I have a food blog – but this definitely is not everything I eat all day long.  Kath blogs every single thing she puts in her mouth.  It’s a way to keep tabs on your diet, and I think a great way to keep yourself in check.  You might not have that extra slice of cake, if you have to let the world know about it too.   I’ve taken a few tips from her blog into my own diet – like adding chia seeds to my oatmeal and yogurt.  But my favorite suggestion is definitely these Kale chips.  I’ve actually made them a few times but never got around to taking a photo yet.  They are basically just roasted kale.  But you will not believe how delicious and addictive they are.   Seriously – you will want seconds of your veggies with these, I promise.  So yummy!   

Ingredients

  • Kale (I use a half of a bag, about a salad spinners worth)
  • 2 tsp. olive oil
  • 2 Tbsp. parmesan cheese
  • sprinkle of kosher salt

Directions

1. Preheat oven to about 375*

2. Tear the kale leaves off the thick stems and break into bite size pieces.

3. Wash with a salad spinner.

4. Spread out on cookie sheets. Drizzle with about 2 tsp of olive oil.  Sprinkle with Parmesan or your seasonings of choice. Plus a sprinkle of kosher salt.

5. Bake for about 15- 20 minutes, until edges are brown and kale is crispy when moved in pan.

Source: Kath Eats

Printer-friendly version

Jul 14, 2010

Strawberry Banana Oatmeal Brûlée

With the last of my local strawberries, I knew I had to try this recipe and savor every last bite.  It is such a fun way to spice up your ordinary breakfast oatmeal.  You essentially create a brûlée sugar topping  on the fruit using your kitchen torch.  You get that crunchy topping and it is the perfect contrast to the chewy oatmeal underneath.  Enjoy!

Ingredients

(for one serving)

  • 1 cup water
  • dash salt
  • 1/2 cups old fashioned oats
  • 1/4 tsp. vanilla extract
  • 1 tbsp. brown sugar
  • dash of cinnamon
  • Swirl of honey
  • 1 tsp. chia seeds
  • 1/2 banana, sliced thin
  • 6-8 strawberries, sliced thin
  • Granulated sugar

Directions

1. Combine the water, salt, oatmeal in a 2 cup microwave safe bowl.  Cook in microwave on medium for 5-6 minutes.

2.  Remove from the heat and stir in the vanilla, brown sugar, cinnamon, nutmeg, honey and chia seeds, if using.

3. Top with sliced bananas and strawberries in an even layer.  Sprinkle the sliced fruit with granulated sugar in a thin layer – just enough to help the surface caramelize.  Heat with a kitchen torch until the surfaces are golden brown.

Source: adapted from Annie’s Eats

Printer-friendly version

Jul 13, 2010

Grilled Steak Piadini

Summertime is here in full force and I am loving every minute of it!   After successfully making grilled pizzas several times so far – I knew that this recipe was right up my alley.  Basically you make the sandwich bread right on the grill, along with the steak for the sandwich.  Combined with some fresh spinach, blue cheese and a balsamic vinegar dressing – this is one delicious sandwich!  Enjoy!

Ingredients

dough

  • 3/4 cup of warm water (110 degrees F)
  • 1 1/2 tsp. rapid-rise active dry yeast
  • 1/4 tsp. sugar
  • 2 1/4 cups all-purpose flour, plus more for rolling the dough
  • 1 1/2 Tbsp. extra-virgin olive oil
  • 1 tsp. kosher salt

dressing

  • 2 Tbsp. extra-virgin olive oil
  • 2 tsp. balsamic vinegar
  • 1 garlic clove, minced
  • 1/2 tsp. Dijon mustard
  • 1/4 tsp. kosher salt
  • 1/8 tsp. ground black pepper

sandwich

  • 1 rib-eye steak (about 6-8 ounces)
  • olive oil
  • kosher salt and pepper
  • 4 ounces blue cheese (or Gorgonzola)
  • 2 cups of baby spinach or arugula

Directions

for the dough

1. In the bowl of a stand mixer, combine water, yeast and sugar and let stand for 5 minutes.  

2. Add flour, oil and salt and with a dough hook, mix on low speed for about 1 minute, until dough comes together.  Increase speed to medium and continue to mix for 10 minutes, until dough is slightly sticky, smooth and elastic. 

3. Form the dough into a ball, and place in an oiled bowl.  Cover with plastic wrap and let rise, until doubled in size, about 1.5 to 2 hours.

4. Punch down the dough in the bowl and divide into two pieces. 

5. Cut parchment paper into 10-inch square, and lightly oil one side of paper. 

6. Roll each piece of dough flat into an 8 to 10 inch round.  Lay each piece of dough on parchment, and lightly oil the top. Set aside until ready to grill.

for the dressing

1. Combine all dressing ingredients in a small bowl and whisk to combine.  

to grill sandwich

1. Preheat grill on high for 30 minutes. 

2. Lightly brush each side of the steak with oil and season with salt and pepper. 

3. Cook steaks until desired doneness, about 6-10 minutes each side.  Set aside.

4. Reduce heat to medium and lay the dough rounds on the grill, parchment side up.

5.  Grab one corner of the parchment with tongs and peel off.  Grill until the rounds are golden and marked on the underside, about 2 to 3 minutes. 

6. Flip the crusts and distribute the cheese over each crust and continue to cook until the cheese is melted, about 2-3 minutes. 

7. To assemble the sandwich, slice the steak and top with spinach and dressing.  Fold in half and cut each piadini in half.

Source: Weber’s Way to Grill

Printer-friendly version

Jul 12, 2010

Quick Yeast Dinner Rolls

If you want a really simple, easy, quick (weeknight!) dinner roll – this recipe is perfect.   That is exactly what I was looking for when I made skillet pasta puttanesca.  I made these when I first got home from work – and by the time I had dinner ready – these were ready too.  There is something magical about a fresh baked dinner roll.  Enjoy!

Ingredients (for the photos above I made a third of this recipe)

  • 1 1/2 cups warm water (110 degrees F)
  • 1 Tbsp. instant yeast
  • 2 Tbsp. granulated sugar
  • 2 Tbsp. vegetable oil
  • 1 tsp. sea salt
  • 4 cups all-purpose flour
  • 1 Tbsp. melted butter (optional)
  • 1 tsp. dried italian seasoning (optional)

Directions

1. In the bowl of a stand mixer, stir together warm water, yeast, and sugar. Let stand until creamy, about 5 minutes.

2. To the yeast mixture, add the oil, salt, and 2 cups of the flour - on low speed with the paddle attachment incorporate the flour to create a wet, sticky mixture. Still on low speed, add 1 cup of the remaining flour and incorporate.

3. Switch to the dough hook and add the remaining 1 cup flour. On low speed, mix the dough to incorporate the final addition of flour until the dough has pulled away from the sides of the bowl.

4. Turn the speed to medium and knead until smooth and elastic, about 5 minutes.

5. Lightly oil a large bowl and place the dough in the bowl - turn to coat. Cover the bowl with plastic wrap and let rise in a warm place until doubled in volume, about 20 -30 minutes.

6. Turn the dough out onto a lightly floured surface and gently deflate into a rectangle. Cut it in half vertically, then each half vertically again into thirds so you have 6 equal strips of dough. Cut each strip of dough into fourths by cutting horizontally to make 24 little squares of dough.

7. Take each piece of dough and cup it lightly under the palm of your hand on a clean surface.  Press lightly and start rotating and rolling the dough ball quickly so that it forms a nice little ball of dough.

8. Place each piece of dough into a lightly greased 9x13 baking pan in rows of 4 about 1/2-inch apart.

9. Cover the rolls in the pan with a lightly greased piece of plastic wrap and let rise to double while your oven is preheating to 400 degrees F, about 20 minutes.

10. If you want an even more golden color to the rolls, brush them with a little melted butter and italian seasoning before baking.

11. Bake for 13-15 minutes in the preheated oven, or until golden brown.

Source Phe.MOM.enon

Printer-friendly version

Jul 9, 2010

Skillet Pasta Puttanesca

We recently went out to dinner at one of our favorite Italian restaurants and I had the Pasta with Puttanesca sauce.  It was so delicious I wondered why I never made it myself – and considering that both of us love olives – I immediately searched for a recipe.  Of course, I went to Cooks Illustrated to find the perfect recipe – and this recipe is not just the sauce – it is one of their quick, easy the skillet meals – perfect for a weeknight dinner! 

I want to give some love to my amazing All-Clad pots and pans – I love them more that I ever thought I could love pots and pans! lol!  I’m sure if you have them – you know that I’m talking about – and if you don’t – you are missing out.  :)

Ingredients

  • 1 Tbsp. olive oil
  • 6 garlic cloves , minced
  • 2 anchovy fillets , rinsed and minced (optional, but important for flavor)
  • 1/4 tsp. red pepper flakes
  • 1 (28-ounce) can crushed tomatoes
  • 3 cups water
  • 12 ounces ziti (3 3/4 cups)
  • 1/2 cup red wine
  • 1/2 cup grated Parmesan cheese
  • 1/4 cup minced fresh basil leaves
  • 1/2 cup kalamata olives, chopped coarse
  • 1 cup shredded mozzarella cheese

Directions

1. Adjust oven rack to middle position and heat oven to 475 degrees.

2. Combine oil, garlic, anchovy, pepper flakes, and 1/2 teaspoon salt in 12-inch, ovensafe nonstick skillet and sauté over medium-high heat until fragrant, about 1 minute.

3. Add crushed tomatoes, water, ziti, and 1/2 teaspoon salt. Cover and cook, stirring often and adjusting heat as needed to maintain vigorous simmer, until ziti is almost tender, 15 to 18 minutes.

4. Stir in wine, Parmesan, basil, and olives. Season with salt and pepper to taste.

5. Sprinkle mozzarella evenly over ziti. Transfer skillet to oven and bake until cheese has melted and browned, about 10 minutes. Serve.

Source: Cook’s Illustrated

Printer-friendly version

Jul 8, 2010

Chewy Chunky Blondies

Dorie Greenspan does not disappoint – perhaps that is why there is an entire baking group devoted to her.   And this is a recipe that I have made multiple times since I bought her baking book a few years back.  Which incidentally – I bought before I even heard about Tuesdays with Dorie – I remember hearing an interview with her on NPR and immediately went and bought her book. 

What I love most about this recipe is that it is super easy to put together – and I almost always have all of the ingredients already on hand.  So this is one of my go-to recipes when I need an easy dessert.  I’ve made them for work several times already – and they always get eaten up super quick.    Enjoy!


Ingredients

  • 2 cups all-purpose flour
  • 3/4 tsp. baking powder
  • 1/2 tsp. baking soda
  • 1/2 tsp. salt
  • 2 sticks unsalted butter, at room temperature
  • 1 1/2 cups (packed) light brown sugar
  • 1/2 cup sugar
  • 2 large eggs
  • 1 tsp. pure vanilla extract
  • 1 cup semi- or bittersweet chocolate chips
  • 1 cup Heath Toffee Bits
  • 1 cup coarsely chopped walnuts
  • 1 cup sweetened shredded coconut

Directions

1. Center a rack in the oven and preheat the oven to 325 degrees F.  Butter a 9×13-inch baking pan and put it on a baking sheet.

2. Whisk together the flour, baking powder, baking soda and salt.

3. Working with a stand mixer fitted with a paddle attachment beat the butter on medium speed until smooth and creamy. Add both sugars and beat for another 3 minutes, or until well incorporated.

4. Add the eggs one by one, beating for 1 minute after each addition, then beat in the vanilla.

5. Reduce the mixer speed to low and add the dry ingredients, mixing just until they disappear into the batter.

6. Using a rubber spatula, stir in the chips, toffee, nuts and coconut. Scrape the batter into the buttered pan and use the spatula to even the top as best you can.

7. Bake for about 40 minutes, or until a knife inserted into the center of the blondies comes out clean. The blondies should pull away from the sides of the pan a little and the top should be a nice honey brown.

8. Transfer the pan to a rack and cool for about 15 minutes before turning the blondies out onto another rack. Invert onto a rack and cool the blondies to room temperature right side up.

9. Cut into 32 bars, each roughly 2-1/4 x 1-1/2 inches.

Source: Baking: from my home to yours by Dorie Greenspan

Printer-friendly version

Jul 7, 2010

Asian Lettuce Wraps

If you want an easy, tasty, healthy dinner – this is a great recipe to try.  I know they are quite popular but I’ve actually never had a lettuce wrap before.  But I will again – since I will definitely make these again soon.  The filling with flavorful and delicious – and can be easily adapted to suit your tastes.  Enjoy!
 

Ingredients
For the sauce

  • 1½ tsp. hoisin sauce
  • 1 tsp. soy sauce
  • ½ tsp. sesame oil
  • 1 tsp. rice wine vinegar
  • Freshly ground black pepper
  • 1 tsp. Sriracha hot sauce

For the filling

  • 2 tsp. canola oil
  • 1 minced garlic clove
  • ½ tsp. grated fresh ginger
  • 2 green onions, chopped
  • 1 lb. ground turkey or chicken
  • 2 cups mixed vegetables (e.g. frozen peas, shredded carrots, diced red pepper and chopped onion)
  • ½ green apple, finely chopped

To assemble

  • Butter or Iceberg lettuce leaves, washed and separated

Directions
1. Combine all the ingredients for the sauce in a small bowl and mix to blend.

2. To make the filling, heat a skillet on high heat with cooking oil. 

3. Once the pan is hot, add the garlic, ginger and green onions to the pan, and stir fry for a few seconds, just until fragrant. 

4. Add the ground turkey or chicken, breaking into small pieces, and cook until almost cooked through. 

5. Add the vegetables to the pan and cook for 1-2 minutes.  Mix in the sauce and cook for about 1 minute until thickened slightly.  Add the apples to the pan and toss to coat.  Immediately remove the pan from the heat.

6. Serve the filling in lettuce “cups”.

Source: Annie’s Eats who adapted from Steamy Kitchen

Printer-friendly version
Jul 6, 2010

Orecchiette with Italian Sausage, Broccoli and crunchy breadcrumbs

I sometimes have bad luck with grocery shopping.  I meal plan each week – and I shop according to that plan.  So when I can’t find a key ingredient in a dish – I have to improvise on the spot or try to come up with something else to make.  So I knew that my grocery store carried broccoli rabe – since I’ve seen it there before.  But this day it didn’t – so I had to substitute broccoli.  It may not seem like a huge difference – but they are two different vegetables with different tastes!   So next time I find it I will have to try it in this recipe – since we both really liked it.  I was actually surprised at how flavorful and delicious this meal turned out to be! 

Ingredients

  • 3-4 slices stale white bread, roughly chopped
  • salt and pepper, to taste
  • 1/2 tsp. garlic powder
  • 1/2 tsp. dried basil
  • 1/2 tsp. dried oregano
  • 3 Tbsp. olive oil


  • 1 pound broccoli (or broccoli rabe), trimmed and cut into pieces
  • 1 Tbsp extra virgin olive oil,
  • 2 garlic cloves, minced
  • 1/2 lb sweet Italian sausage, casings removed
  • Pinch red pepper flakes
  • 1 pound orecchiette pasta
  • Salt & freshly ground black pepper, to taste
  • parmesan cheese, for serving

Directions

1. In the bowl of a food processor, combine bread with salt, pepper, and dried herbs. Pulse briefly until bread breaks down into roughly 1/4-inch chunks.

2. Heat 3 tablespoons olive oil in a large skillet. Add breadcrumbs and toss until well coated. Saute until golden brown and crispy, being careful not to let the smaller pieces burn. Remove from heat and set aside to cool.

3. Bring a large pot of salted water to a rolling boil.  Cook the broccoli (2-3 minutes) or broccoli rabe (5-7 minutes) in the boiling water.  Remove with a slotted spoon when done and cook the pasta according to the package directions.

4. Meanwhile, heat the 1 Tbsp. oil in a large skillet over medium-low heat.

5. Add the garlic and cook until it begins to sizzle, about a minute; add the sausage and red pepper flakes and continue cooking until nicely browned, 5 to 7 minutes.

6. Transfer the broccoli to the skillet. Cook over medium-high heat, adding some of the pasta water as needed to help soften the broccoli.

7. Remove the pasta when it is barely al dente, drain, reserving about a cup of the cooking water.

8. Add the pasta to the skillet with the broccoli and sausage and a couple of tablespoons of the reserved cooking water as needed; toss with until well combined. Season with salt and pepper. Top with breadcrumbs and parmesan cheese, as desired.

Source: slightly adapted from Love and Olive Oil

Printer-friendly version

Jul 5, 2010

Halfway Bars

My niece still remembers that I was the one who made her cake.   So when she is at home cooking in her play kitchen – she will call Aunt ‘tine (that’s me) on her play phone to ask for a recipe.  I think it is the sweetest compliment an Aunt could ask for!   So when she was over at my house one weekend – I decided we should bake together – and at two and a half – baking with her means making a mess!  She helped me stir the flour, press it in the pan and sprinkle (and eat!) chocolate chips.   Then we watched the cookies bake in the oven.   She wanted to eat them right away – and when I wasn’t looking – she managed to stick her finger in them for a taste!  :)
Here she is enjoying her ‘cookie’!  I love her so much – she is a great helper!  This is just the first of many recipes that we will bake together.   
 

Ingredients

  • 2 cups flour
  • 1 tsp. salt
  • 1/4 tsp. baking soda
  • 1 tsp. baking powder
  • 1/2 cup unsalted butter, softened
  • 1/2 cup granulated sugar
  • 1 cup brown sugar, separated
  • 2 eggs, separated
  • 1 Tbsp. water
  • 1 tsp. vanilla
  • 12 ounces semi-sweet chocolate chips or chunks

Directions

1. Preheat the oven to 350°.

2. Cut two pieces of aluminum foil and fold them to match the width of a 13 x 9 inch pan. Press one piece into the pan lengthwise and the other into the pan crosswise with the ends hanging over the sides of the pan. Spray the foil with nonstick spray.

3. Whisk together the flour, salt, baking soda, and baking powder in a small bowl and set aside.

4. Using a standing mixer cream together the butter, the granulated sugar and 1/2 cup of the brown sugar until smooth.

5. Separate the eggs, reserving the whites. Mix the yolks into the butter-sugar mixture one at a time until they are completely absorbed, then mix in the water and vanilla.

6. With the mixer at a low speed, add the flour mixture and beat gently until all the flour has been absorbed and the dough looks crumbly.

7. Press the cookie dough gently into the pan with your hands, making sure the surface is even.

8. Sprinkle the chocolate chips on top of the cookie dough and use your palms to press them slightly into the dough.

9. Using a stand or hand mixer with a clean bowl and a clean whisk attachment, start whisking the egg whites. Gradually increase your speed to medium-high. When the egg whites are very frothy and look like loose foam, start adding the remaining 1/2 cup of brown sugar a little at a time. Continue increasing your speed to the highest setting. When all the sugar has been added, continue whipping the meringue until it holds a soft peak.

10. Scoop the meringue down the middle of the pan. It will be very sticky! Use a spatula to gently spread the meringue from the middle to the edges.

11. Lightly press a piece of parchment or wax paper on the top of the meringue (this makes an even layer and protects the meringue from scorching). Bake for 20 minutes, then remove the parchment. Continue baking for an additional 5-10 minutes, until the edges look toasted and are pulling away from the sides of the pan.

12. Wait until the pan is completely cook before lifting out the bars and cutting them into pieces.

Source: The Kitchn

Printer-friendly version