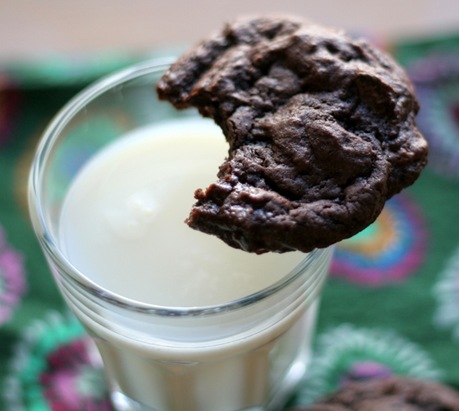
Dec 30, 2011

Best of 2011

2011 isn’t really a year that I want to remember, but looking back on what I’ve posted – I have made some pretty yummy things.  I’ve also been making lots of my old favorites – so I haven’t had as much new content on the blog this year.

I’ve definitely seen an improvement in my photography as I work my way though understanding my dSLR.  I hope that 2012 brings many more delicious treats and healthy dinner ideas to share with you!  Here’s a year-in-review of my favorite recipe (or recipes) from each month this year.  I don’t know about you – but I can’t wait to ring in 2012!

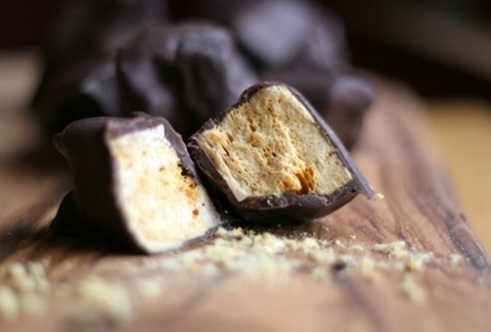
JanuarySponge Candy

image

Living in Buffalo, NY sponge candy is considered a staple candy.  I’m glad I found a recipe that others can enjoy if they can’t get sponge candy as easily as I can.

FebruaryChocolate Macarons & Thin Crust Pizza

image

My first and only (I definitely need to change that this year!) attempt at French Macarons.  They were amazing and I was so happy they turned out so perfectly. 

image

Thin crust pizza – I seriously need to make this again STAT.  Crispy, chewy crust and so satisfying.

MarchChicken lo mein

image

This has become one of my go-to easy weeknight meals.  I’ve discovered these lo mein noodles at my grocery store – and this meal is even easier since I just have to defrost the noodles and not boil them separately.  I’ve made this meal more times than I can count – and I haven’t ordered Chinese take-out since! 

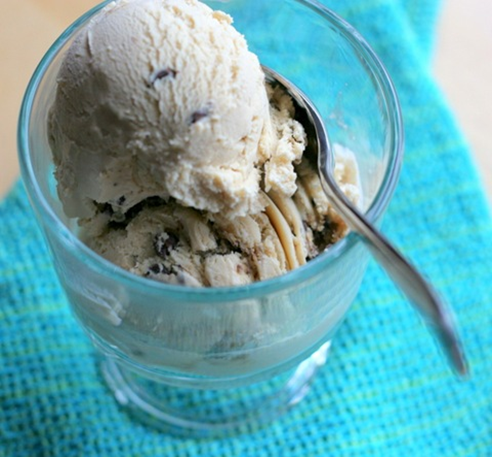
AprilDouble Chocolate Chip Cookie Dough Ice Cream

image

I love anything cookie dough and I love anything ice cream – so this was a no-brainer.  Almost too good to be true…

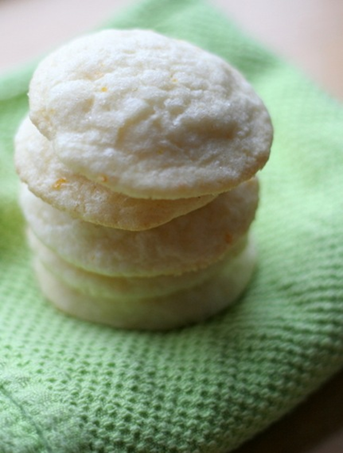
MayMeyer Lemon Cookies

image

I travelled for work a ton in May – so I didn’t do a lot of cooking or blog posting.  But I did discover my love for Meyer lemons – and these cookies were a great example of a way to use them. 

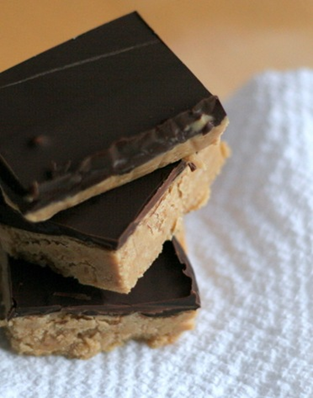
JuneChocolate Peanut Butter Squares

image

This is a family recipe that I’ve enjoyed my entire life – and finally got around to posting on the blog.  I like to keep leftovers in the freezer and eat them straight out of the freezer – it’s a reese’s cup, but better.

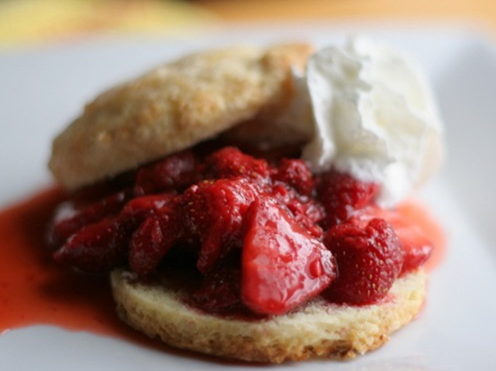
JulyStrawberry Shortcakes

image

July was my month of almost exclusive strawberry desserts – and shortcakes were my favorite way to enjoy them.   It doesn’t feel more like summer than fresh shortcakes and fresh, local strawberries.  Luckily I still have some more in my freezer to enjoy over the winter.

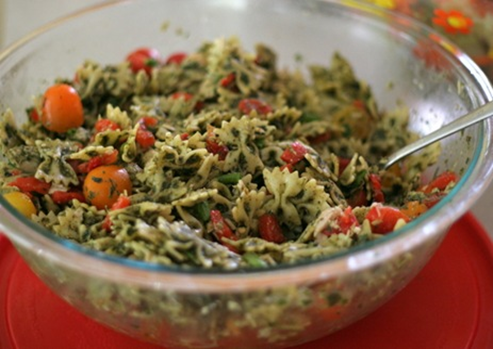
AugustLemon Tuna Pesto Salad

image

This is one of my husbands favorite pasta salads – fresh tomatoes, fresh pesto, tuna and lemon.  It’s the perfect summer salad – I can almost feel the summertime heat just thinking about this dish. 

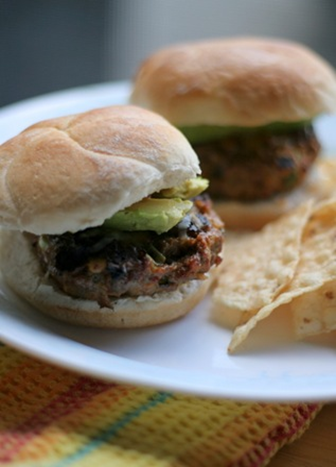
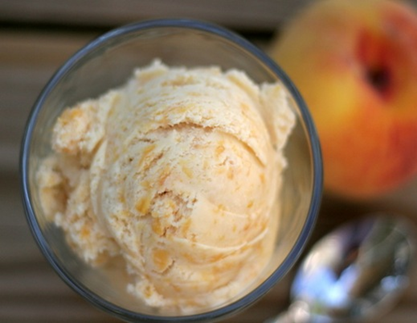
SeptemberSanta Fe Burgers & Peach Brown Sugar Ice Cream

image

These burgers were a surprise hit with me – and turned out to be one of my new favorite burger recipes.  I can’t wait until its warm enough to grill outside again.

image

Peaches are my favorite fruit – so peach ice cream never fails me.  The brown sugar was the perfect compliment to perfect summer peach.

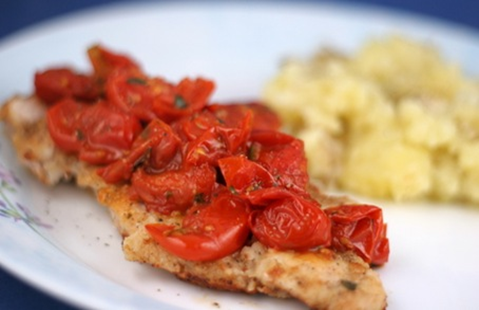
OctoberChicken with tomato-herb pan sauce

image

Just seeing this photo again made me add this on the menu for next week.  I forgot how much we loved this and how flavorful it was with just a few ingredients. 

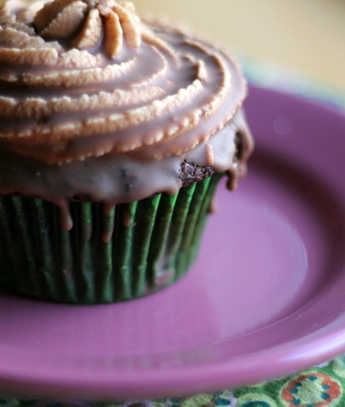
NovemberChocolate Peanut Butter Cupcakes

image

Easily one of the richest desserts of the year – but completely worth every.single.calorie.

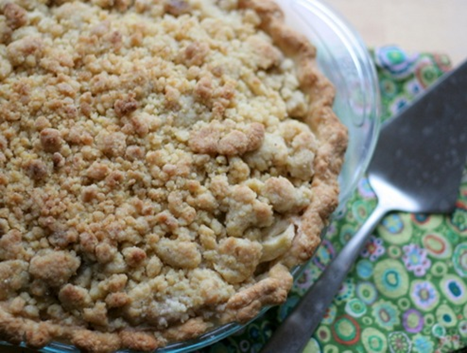
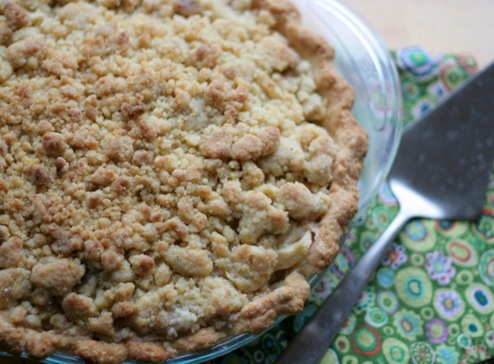
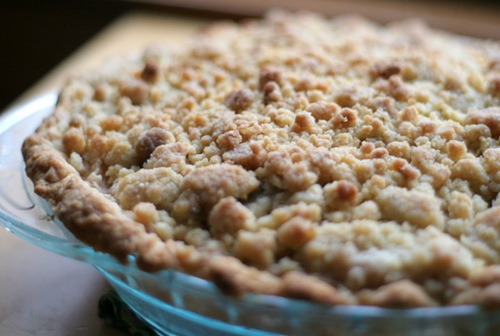
DecemberDutch Apple Pie

image

My new staple recipe for apple pie – I know I can never try another recipe after tasting this one.

Thanks for reading – and here’s to a great 2012!!!! 

Dec 21, 2011

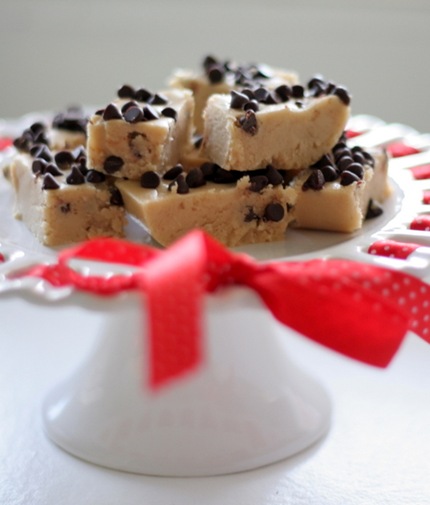
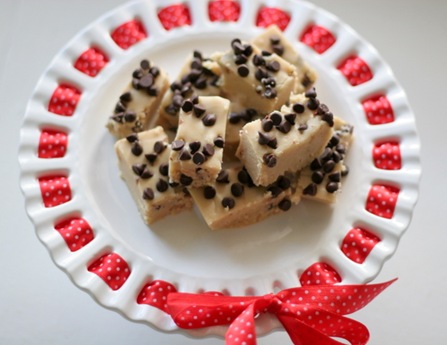
Chocolate Chip Cookie Dough Fudge

chocolate chip cookie dough fudge 1

It’s holiday time!  I hope everyone is having fun baking new and old recipes.  I knew the second I saw this recipe that it would be a hit with pretty much anyone who tried it.  I found myself eating the edges as I was cutting it – and it is highly addictive.   

chocolate chip cookie dough fudge 2

This recipe has now been added to my chocolate chip cookie dough obsession – along with truffles, ice cream and cupcakes.

It’s impossible to not want more cookie dough. It’s not to late to add this one to your holiday baked goods.  Enjoy and Happy Holidays!

chocolate chip cookie dough fudge 3

Ingredients

  • 1 3/4 cup sugar
  • 3/4 cup brown sugar
  • 1/2 cup heavy cream 
  • 1/4 cup milk
  • 1 Tbsp. corn syrup
  • 3/4 tsp.  kosher salt
  • 2 Tbsp. unsalted butter
  • 1 tsp. vanilla extract
  • 1/2 cup flour
  • 1/3 cup mini semi-sweet chocolate chips

Directions

1. Spray an 8x8 inch  baking dish with cooking spray and set aside.

2. In a 3-quart saucepan, combine the sugars, cream, milk, corn syrup and salt.  Cook over medium heat, stirring occasionally, until the mixture reaches 242 degrees F (i.e. the soft-ball stage). 

3. Remove from heat and stir in the butter, vanilla, and flour.

4. Pour the mixture into the bowl of a stand mixer fitted with the paddle attachment, and allow to cool until it reaches 110 degrees – it takes about 20 minutes to cool.

5. Beat at medium speed until the fudge thickens and holds its shape, 3 to 5 minutes. 

6. Transfer the fudge to the prepared 8x8 inch dish and smooth the top with a spatula.  Sprinkle the chocolate chips over the top, pressing them lightly into the fudge.

7. Allow to set at least 2 hours.  If it's not setting up, cover and refrigerate for a few hours.  Cut into squares and store in an airtight container.

Source: Pink Parsley

Printer-friendly version

Dec 19, 2011

Winner!

The winner of the Oxo Egg Beater is...


Congrats Chelsea!  I'll contact you directly to send you your prize!!  

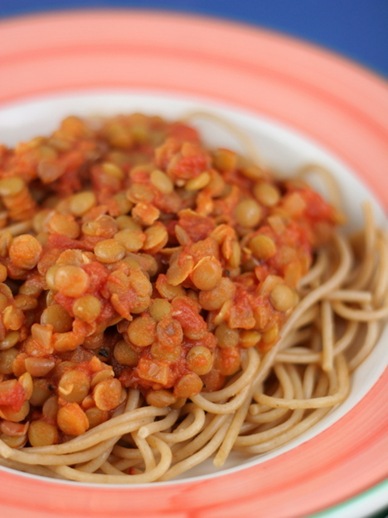
Lentil Marinara

lentil marinara 1

It’s that time of year that you need to eat healthy meals during the week in order to balance out all of the extra sweets and snacks that turn up everywhere you go.  This lentil marinara is just that – super healthy and really filling.  I ate it for lunch two days in a row – and I was so full I barely had room for dinner at night. 

It’s a great vegetarian alternative to meat sauce, it definitely has more depth than just plain marinara sauce since the lentils give it a nice texture.  Also – this recipe makes a pretty big batch – so feel free to halve it or freeze the leftovers for later.  Enjoy!
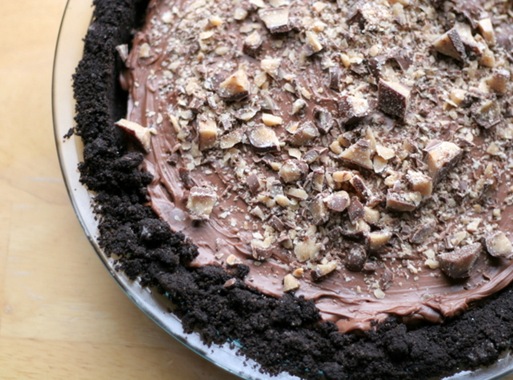
lentil marinara 2

Ingredients

  • 2 Tbsp. olive oil
  • 1 onion, diced
  • 4 garlic cloves, minced
  • 1/4 teaspoon red pepper flakes
  • 1/2 tsp. dried oregano
  • 1 tsp. dried basil
  • 1/4 cup white or red wine
  • 2 (28-ounce) cans whole tomatoes, coarsely chopped
  • 1 (1-pound) bag lentils, rinsed and picked over
  • 3 cups water
  • 1 tsp. salt

Directions

1. In a large saucepan heat the oil over medium heat.  Add the onion and a pinch of salt and cook, stirring occasionally, until the onion just starts to brown around the edges, about 8 minutes.  Add the garlic, red pepper flakes, oregano and basil and cook, stirring constantly, until fragrant, about 30 seconds.

2. Add in the wine, scraping any browned residue on the bottom of the pan.  Increase the heat to medium-high and add the remaining ingredients.

3. Bring to a simmer, then reduce the heat to medium-low and cook, stirring occasionally, about 30 - 45 minutes, until the lentils are tender and the sauce is thickened.

Source: adapted from The Way the Cookie Crumbles

Printer-friendly version

Dec 16, 2011

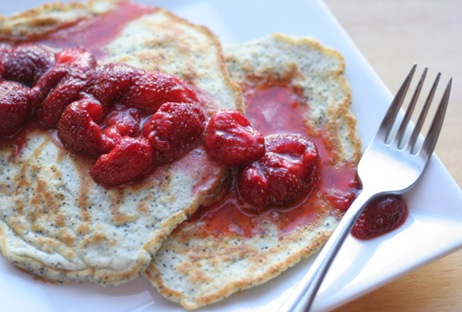
Lemon Poppy seed Pancakes & OXO Give-a-way!

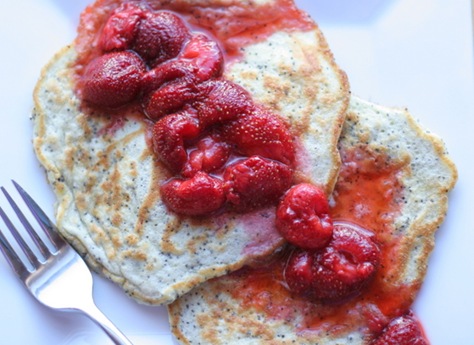
lemon poppy seed pancakes 1

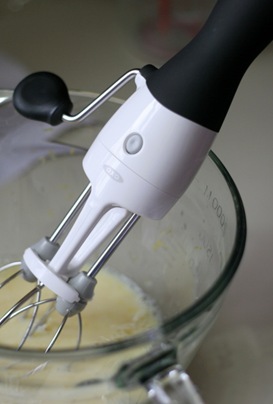
Oxo (the makers of numerous ergonomically friendly kitchen and household products) sent me one of their newest items – the Egg Beater to try out! 

I’ve never owned a hand-held egg beater before – and now I’m wondering why!   It is really smooth and easy to quickly mix up this batter (and I’ve also tried it with some scrambled eggs).  Like their other products that I own – the handle is really big and comfortable.  My favorite part is that it comes apart really easily to put into your dishwasher (I hate hand-washing anything).  It is perfect for eggs, batters and small batches of whipped cream.  I’m hoping to get plenty of use out of it in the future – there are lots of times I really don’t need to drag out my stand mixer or even my hand-held electric one.  So this is the perfect alternative.  

lemon poppy seed pancakes 2

Do you want to own one?  Lucky for you OXO also sent me an Egg Beater to give-a-way to one of my readers!  

Please leave a comment in this post (no Anonymous comments) telling me what your favorite breakfast item is?

The Giveaway ends on Midnight EST December 18th, 2011.  Only open to U.S. residents. You may only enter once (duplicate entries from the same IP address will be deleted). Please leave a valid email address or website so I can reach you to claim your prize.  Winner will be chosen based on the number of comments received by random.org.

lemon poppy seed pancakes 4

I don’t want to forget to tell you about these pancakes.  They are the perfect alternative to your usual breakfast, in case you are in a rut.  The lemon zest really makes these taste lemon-y and the poppy seeds give a bit of texture to the pancakes.  I topped them with some sliced strawberries mixed with a bit of maple sugar – which was a nice complement to the lemon flavor in the pancakes.   I definitely plan to make these again soon! Enjoy!

lemon poppy seed pancakes 3

Full Disclosure: I was provided the Oxo Egg Beater for free as part of the Oxo Blogger Outreach program.  However, the opinions in this post are completely mine.

Ingredients

  • 1 cup all-purpose flour
  • 1/2 tsp. baking powder
  • 1/4 tsp. baking soda
  • 2 Tbsp. sugar
  • pinch of salt
  • 2 Tbsp. poppy seeds
  • zest of 1/2 lemon
  • 1 cup milk
  • juice from 1/2 lemon
  • 1 large egg
  • 1 Tbsp. canola oil, plus more for cooking
  • Strawberries and sugar for topping (optional)

Directions

1. Combine the milk and lemon juice in a measuring cup, set aside for 5-10 minutes.

2. Combine the flour, baking powder, baking soda, sugar and salt in a bowl, set aside.

3. In a separate bowl combine the milk (now its actually buttermilk), egg, oil, lemon zest and poppy seeds.  Mix thoroughly to combine.

4. Stir all the ingredients until they are just combined.

5. Heat your skillet or griddle to medium and add a bit of oil. Pour about 1/3 of a cup of batter into the skillet.  Wait until the pancake bottom is deep golden in color, then flip with a spatula and cook the other side until golden and cooked through. Repeat with the remaining batter. 

6. Serve with strawberries, if desired.

Source: adapted from Picky Cook

Printer-friendly version

Dec 14, 2011

Flourless Fudge Cookies

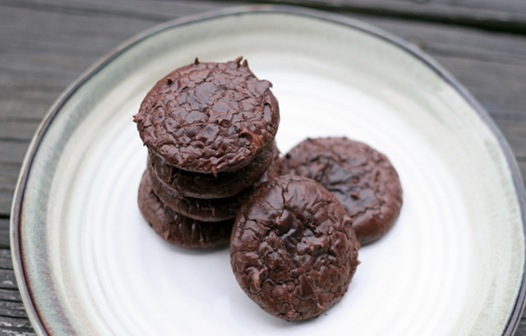
flourless fudge cookies

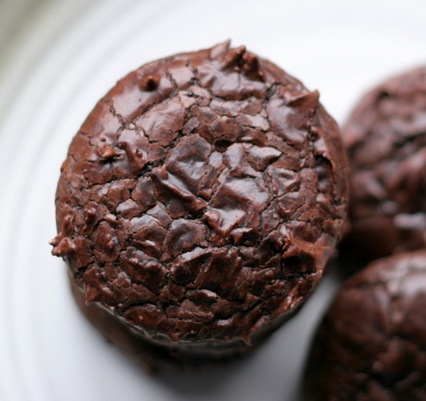
I was looking for an quick and easy gluten-free and dairy-free dessert recipe to make for a last minute get-together since one of my Aunts can’t have either of those items.   I easily whipped these up and baked them in no time at all.  The are super gooey and fudgey – who would think the only chocolate flavor comes from the cocoa powder.  You definitely need to use high-quality cocoa in a recipe like these (I buy mine at Penzeys), otherwise the intense fudgey flavor will not shine through.

Enjoy! 

flourless fudge cookies 2

Ingredients

  • 2 1/4 cups confectioners' sugar
  • 1/4 tsp. salt
  • 1 tsp. espresso powder
  • 1 cup Dutch-process cocoa powder 
  • 3 large egg whites
  • 2 tsp. vanilla extract

Directions

1. Preheat oven to 350 degrees F. Line two baking sheets with parchment paper or silicone liners.

2. Stir together all of the ingredients until smooth and completely mixed.

3. Drop batter onto baking sheets (a cookie scoop will be very helpful since the batter is sticky).

4. Bake the cookies for 8-10 minutes, until the tops are crackly.  Cool completely on baking sheet.

Source: King Arthur Flour

Printer-friendly version

Dec 12, 2011

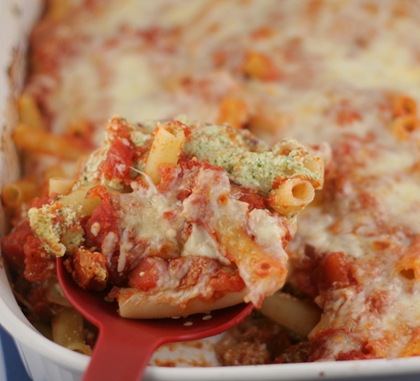
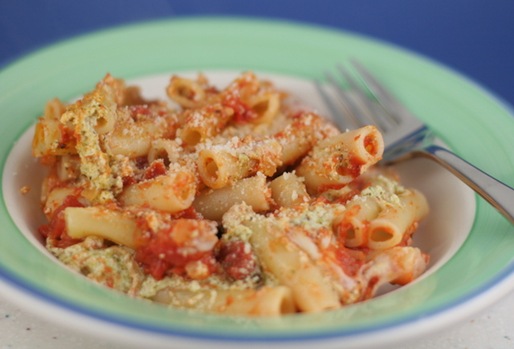
Baked Ziti with pesto

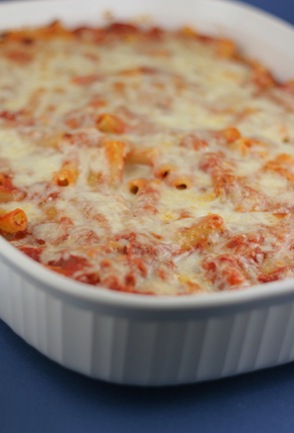
baked ziti with pesto

Now that the winter is no doubt upon us – I am ready for baked pasta dishes.  There is something so satisfying and comforting about pasta baked with sauce and cheeses. 

baked ziti with pesto 2

This version mixes in some pesto sauce right in with the ricotta cheese mixture.  Its an easy way to get that fresh herb taste – without having to buy fresh herbs!  I can’t just walk into my backyard and pick some fresh basil anymore – so this is perfect.   My grocery store has a great olive bar that also has fresh-made pesto – so I bought just the amount that I would need for this recipe. 

Enjoy!

baked ziti with pesto 3

Ingredients

  • 1 pound ziti
  • 2 Tbsp. olive oil
  • 1 onion, chopped fine
  • 2 cloves garlic, minced
  • 1 (28 oz.) can crushed tomatoes in thick puree
  • 1/4 tsp. salt
  • 1 bay leaf
  • 1/2 tsp. fresh-ground black pepper, divided
  • 1 cup ricotta cheese
  • 2 cups grated Mozzarella cheese, divided
  • 1/3 cups Parmesan cheese, divided
  • 1/4 cup store-bought or homemade pesto

Directions

1. Heat the oven to 350 degrees F.  Spray a 9 x 13 inch baking dish with cooking spray.

2. In a medium-sized saucepan, heat the oil over medium heat.  Add the onion and cook stirring occasionally, until translucent, about 5 minutes.  Add the garlic and cook, stirring, for 30 seconds.  Add the tomatoes, salt and bay leaf. 

3. Bring to a simmer over medium heat and cook until very thick, about 15-20 minutes.  Stir in 1/4 tsp. of the pepper.  Remove the bay leaf.

4. In a large pot of boiling salted water, cook the pasta for 7 minutes.  (It will be partially cooked). Drain.

5. In a medium bowl, combine the ricotta, 1 cup of the mozzarella, 3 Tbsp. of the Parmesan, the pesto and remaining 1/4 tsp. pepper.

6. Put half of the cooked pasta into the prepared baking dish and top with about a third of the tomato sauce.  Spread the ricotta mixture on the sauce in an even layer.  Cover with the remaining pasta and then the remaining sauce.  Top with the remaining 1 cup of mozzarella and the rest of the Parmesan. 

7. Bake, covered with foil about 30 minutes; then remove foil and bake for an additional 5-10 minutes, until top begins to brown.  Let rest 10 minutes before cutting.

Source: adapted from Bake-aholic

Printer-friendly version

Dec 7, 2011

Dutch Apple Pie

dutch apple pie 1

Out of all the desserts I made this year for Thanksgiving (Pecan pie bites, Chocolate Toffee Pie, Pumpkin pie, Lemon Meringue Pie, Concord Grape Pie) – I was most excited about this Dutch Apple Pie. 

dutch apple pie 2

I love a good crumb topping – and this one was about as good as they come.  You actually bake the topping separately for a bit before you top the pie – it helps prevent a soggy topping.  Absolutely genius!

Also – the apples are cooked on the stovetop – so you ensure they are all cooked evenly and to the perfect texture. 

dutch apple pie 3

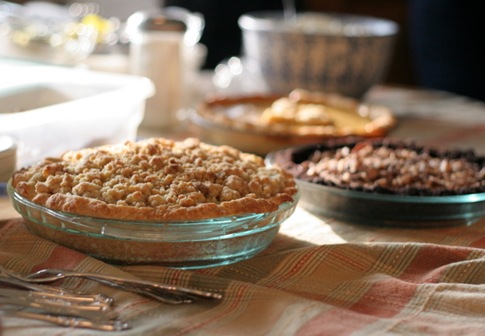
A photo of the pie table.

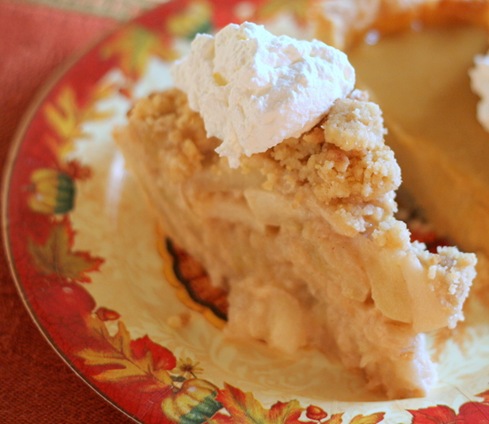
And of course – the filling – it was hard to even take this photo, since I wanted to try the pie so bad.  

I promise to never make another apple pie recipe in my life – I have found ‘the one’. 

Enjoy!

dutch apple pie 4

Ingredients

  • 1 pie crust (I use the recipe found in this post)

Apple Filling

  • 2 1/2 pounds Granny Smith apples
  • 2 pounds McIntosh apples
  • 1/4 cup granulated sugar
  • 1/2 tsp. cinnamon
  • 1/8 tsp. table salt
  • 2 Tbsp. unsalted butter
  • 1/2 cup heavy cream

Streusel Topping

  • 1 1/4 cups unbleached all-purpose flour
  • 1/3 cup packed light brown sugar
  • 1/3 cup granulated sugar
  • 1 Tbsp. cornmeal
  • 7 Tbsp. unsalted butter, melted

Directions

1. Bake the pie crust: Preheat oven to 425 degrees. Line unbaked pie crust with foil and pie weights.  Bake, leaving foil and weights in place until dough looks dry and is light in color, 20 to 25 minutes. Carefully remove foil and weights and continue to bake until pie shell is golden brown, 10 to 15 minutes longer. Remove from oven and set aside.

2. For the apple filling: Peel, quarter, and core apples; slice each quarter crosswise into pieces 1/4-inch thick. Toss apples, sugar, cinnamon, and salt in large bowl to combine.

3. Heat butter in large Dutch oven over high heat until foaming subsides; add apples and toss to coat. Reduce heat to medium-high and cook, covered, stirring occasionally, until apples are softened, about 5 minutes. Cook, covered, stirring occasionally, until Granny Smith apple slices are tender and McIntosh apple slices are softened and beginning to break down, about 5 minutes longer.

4. Remove apples with a slotted spoon – keeping any juices remaining in the pot.  Bring drained juice and cream to boil in now-empty Dutch oven over medium-high heat; cook, stirring occasionally, until thickened and wooden spoon leaves trail in mixture, about 5 minutes.

5. Transfer apples to prebaked pie shell; pour reduced juice mixture over and smooth with rubber spatula.

6. For the streusel topping: Combine flour, sugars, and cornmeal in medium bowl; drizzle with melted butter and toss with fork until evenly moistened and mixture forms many large chunks with pea-sized pieces mixed throughout.

7. Line rimmed baking sheet with parchment paper and spread streusel in even layer on baking sheet. Bake streusel until golden brown, about 5 minutes; cool baking sheet with streusel on wire rack until cool enough to handle, about 5 minutes. Sprinkle streusel evenly over pie filling.

8. Set pie plate on now-empty baking sheet and bake until streusel topping is deep golden brown, about 10 minutes. Cool on wire rack and serve.

Source: slightly adapted from Cook’s Illustrated

Printer-friendly version

Dec 5, 2011

Pumpkin Pie

pumpkin pie 3

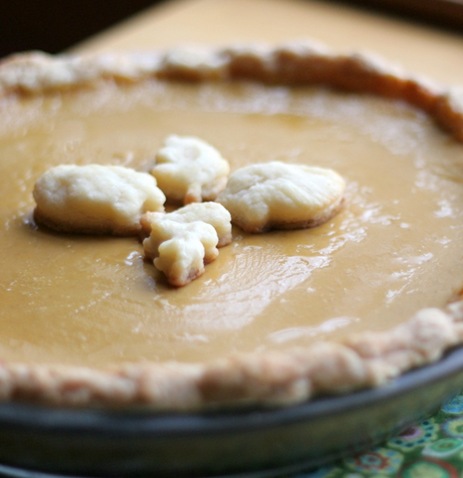
I honestly can not remember the last time I made a pumpkin pie – its usually not assigned to me at Thanksgiving.  But I’m pretty sure that when I did make it I just followed the Libby’s recipe on the back of the can.   This time I wanted to try the Cooks Illustrated version – since they are the tired and true experts. And they’ve got a very interesting recipe and technique.  It was definitely more work than mixing a can of pumpkin with some spices and eggs!   But – I think it was completely worth it.   The pie was super smooth and custardy.  The pumpkin favor really shone through.  

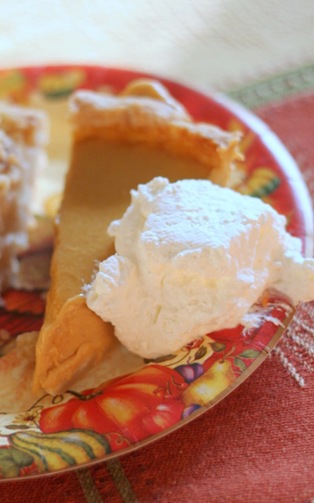
Here is my slice – with about as much whipped cream as pie – I would have it no other way!   Enjoy! 

pumpkin pie 2

Ingredients

  • 1 pie crust (I use the recipe found in this post)
  • 1 cup heavy cream
  • 1 cup whole milk
  • 3 large eggs plus 2 large yolks
  • 1 tsp. vanilla extract
  • 1 (15-ounce) can pumpkin puree
  • 1 cup drained candied yams from 15-ounce can
  • 3/4 cup sugar
  • 1/4 cup maple syrup
  • 2 tsp. grated fresh ginger
  • 1/2 tsp. ground cinnamon
  • 1/4 tsp. ground nutmeg
  • 1 tsp. table salt

Directions

1. Bake pie crust: Preheat oven to 400 degrees F.  Line crust with foil and fill with pie weights.  Bake on rimmed baking sheet 15 minutes.  Remove foil and weights, rotate plate, and bake 5 to 10 additional minutes until crust is golden brown and crisp.  Remove pie plate and baking sheet from oven.

2. While pie crust is baking, whisk cream, milk, eggs, yolks, and vanilla together in medium bowl.

3. Combine pumpkin puree, yams, sugar, maple syrup, ginger, cinnamon, nutmeg, and salt in large heavy-bottomed saucepan; bring to sputtering simmer over medium heat, 5 to 7 minutes. Continue to simmer pumpkin mixture, stirring constantly and mashing yams against sides of pot, until thick and shiny, 10 to 15 minutes.

4. Remove pan from heat and whisk in cream mixture until fully incorporated.

5. Strain mixture through fine-mesh strainer set over medium bowl, using back of ladle or spatula to press solids through strainer. Re-whisk mixture and transfer to warm prebaked pie shell.

6. Return pie plate with baking sheet to oven and bake pie for 10 minutes. Reduce heat to 300 degrees and continue baking until edges of pie are set (instant-read thermometer inserted in center registers 175 degrees), 30 to 45 minutes longer.

7. Transfer pie to wire rack and cool to room temperature, 2 to 3 hours. Cut into wedges and serve.

Source: Cook’s Illustrated

Printer-friendly version

Nov 30, 2011

Chocolate Toffee Pie

chocolate toffee pie 1

I made six different desserts this year for Thanksgiving.  This pie went quicker than anything else.  Any recipe with chocolate and toffee in the title automatically catches my attention because my husband is crazy about anything toffee.   I also wanted to make something with chocolate to balance out the fruit and nuts in the other pies.  This turned out to be super easy to mix up and super delicious.  

chocolate toffee pie 3

I actually only ended up trying one bite of this pie myself – I couldn’t believe how quickly it was gone.   I waited until just before serving to add the additional toffee bits on the top – since they have a tendency to get melty when stored in the refrigerator.  This way they were nice and crunchy.   So if you need a quick and easy (and tasty) pie this holiday season – make sure you add this one to your repertoire. 

chocolate toffee pie 2

Ingredients

Crust:

  • 1 1/2 cups chocolate wafer crumbs
  • 5 tablespoons unsalted butter, melted
  • 2 tablespoons granulated sugar

Filling:

  • 3/4 cup heavy cream
  • 6 ounces bittersweet chocolate, coarsely chopped (or use chips)
  • 3/4 cup cream cheese, softened
  • 1/4 cup packed light brown sugar
  • 1 tsp. vanilla extract
  • 3/4 cup chopped chocolate covered toffee candy

Directions

1. Preheat oven to 350 degrees.

2. Make the crust: In a medium bowl, combine the wafer crumbs, butter and sugar. Press the mixture into the bottom and up the sides of a 9-inch pie place. Bake for 10 minutes. Place on a wire rack to cool.

3. Prepare the filling: Measure the heavy cream in a 2 cup measuring cup. Heat the cream in the microwave for 1 minute until warmed. Remove the cream from the microwave and add the chopped chocolate/chocolate chips to the cream. Let stand, covered for 5 minutes, then stir until cream and chocolate combine and gets smooth.

4. In the bowl of a stand mixer with the paddle attachment, combine the cream cheese, brown sugar and vanilla. Beat with an electric mixer until smooth.

5. Gently beat in the chocolate/cream mixture into the bowl until fully incorporated. Fold in a 1/2 cup of the chopped toffee candy into the mixture.

6. Pour this filling into your cooled chocolate crust. Chill the pie until firm, about 2 hours or overnight to allow flavors to meld.  Sprinkle with remaining 1/4 cup chopped toffee bits before serving.

Source: What’s Cooking, Chicago

Printer-friendly version

Nov 28, 2011

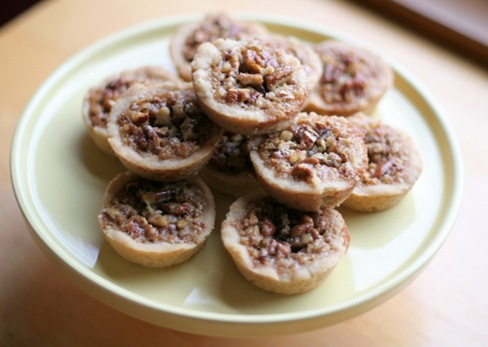
Pecan Pie Bites

pecan pie tartlettes

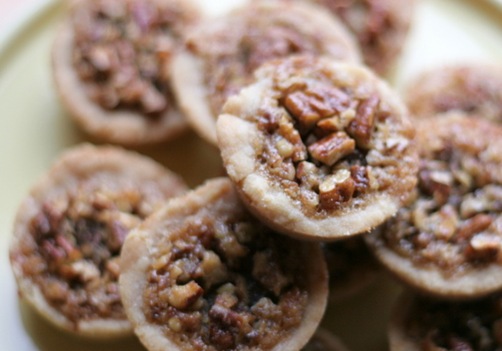
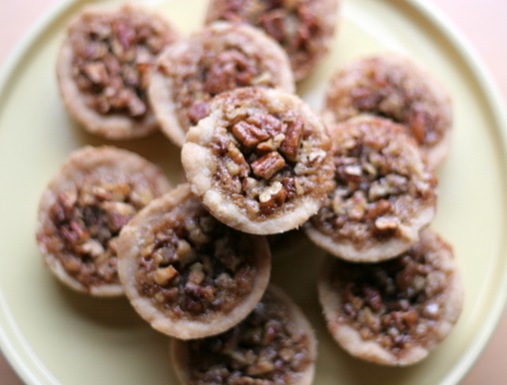
I hope everyone had a wonderful Thanksgiving!  Last year, I made a pecan pie for the first time.  Since its so rich and most people want to try slices of all of the desserts – I decided to make these mini pecan pies this year.  Perfect one or two bites – they are all you need when you are already full and you-can’t-help-but-keep-eating-because-its-Thanksgiving.

pecan pie tartlettes 3

The only issue with a dessert like this is that it takes longer to make than an actual pie!  I only have one mini muffin pan – so I had to make these in two batches.  And its more involved because you have to press in all of the crusts and bake them – then pour in the filling and bake that – and then cool in the pan.   But I promise you that its worth all of the effort.  I’ll definitely be making these again next year!   Enjoy!

pecan pie tartlettes 2

Ingredients

crust:

  • 1 cup (2 sticks) unsalted butter, softened
  • 2/3 cup brown sugar
  • 2 2/3 cups flour
  • 1/2 tsp. table salt

Filling:

  • 1/2 cup sugar
  • 1/2 cup brown sugar
  • 3 eggs
  • 1/4 cup real maple syrup
  • 2 Tbsp. unsalted butter, melted
  • 1 tsp. vanilla
  • 1/2 tsp. table salt
  • 6 oz. chopped pecans
  • Kosher salt

Directions

1. Preheat oven to 350 degrees. Coat mini muffin pans with nonstick spray.

2. Cream butter and 2/3 cup brown sugar in a bowl with a mixer until blended. Add the flour and salt; mix until sandy. Dough will seem dry.

3. Press 1 Tbsp. of dough into each well of prepared muffin tins, shaping up the sides. Prebake the shells for 6 minutes or until set and lightly golden around the edges.

4. Remove from the oven and pat the bottoms down lightly with a small spoon. Set the shells aside.

5. For the filling: whisk both sugars, eggs, maple syrup, butter, vanilla, table salt, and pecans together in a bowl. Pour about 1 Tbsp. filling into each shell. Bake for 15 minutes, or until filling is set and crust is browned.

6. Sprinkle tartlets with kosher salt, then let cool in the pan for 15 minutes. To remove, run a knife around each and carefully lift out.

Makes about 4 dozen tartlets.

Source: Kokocooks

Printer-friendly version

Nov 23, 2011

Peanut Butter M&M Cookies

peanut butter m&m cookies 1

I think I need more mini M&Ms in my life – I just love them - they are the perfect size for baking and snacking.  These peanut butter cookies were super easy to mix together – which is perfect if you don’t have a lot of time.  The were also soft and chewy and crisp around the edges – which I think is the way a cookie should be.  Enjoy!  

And have a very Happy Thanksgiving tomorrow!! 

peanut butter m&m cookies2

Ingredients

  • 1 and 3/4 cups all-purpose flour
  • 1/2 tsp. salt
  • 1 tsp. baking soda
  • 1/2 cup (1 stick) unsalted butter, at room temperature
  • 1/2 cup granulated sugar
  • 1/2 cup brown sugar
  • 1/2 cup creamy peanut butter
  • 1 egg
  • 1 tsp. vanilla
  • 2 Tbsp. milk
  • 1 and 1/2 cups M&M’s (mini or regular)

Directions

1. Preheat the oven to 350 degrees.

2. Line two rimmed baking sheets with parchment paper or silicone baking sheets; set aside.

3. In a large bowl, combine the flour, salt, and baking soda, whisking until combined.  Set aside.

4. In the bowl of your stand mixer fitted with the paddle attachment, cream the butter on medium high speed until smooth, about 1 minute.

5. Add the sugars and peanut butter, mixing until smooth, about 2-3 minutes.

6. Reduce the mixer speed and add the egg, vanilla, and milk, mixing until completely combined.

7. Using a rubber spatula, gently stir in the M&M’s.

8. Drop the cookie dough by rounded tablespoons onto the prepared baking sheets and bake the cookies until lightly golden around the edges, about 10 minutes.  Let cool completely.

Makes about 36 cookies

Source: The Curvy Carrot

Printer-friendly version

Nov 21, 2011

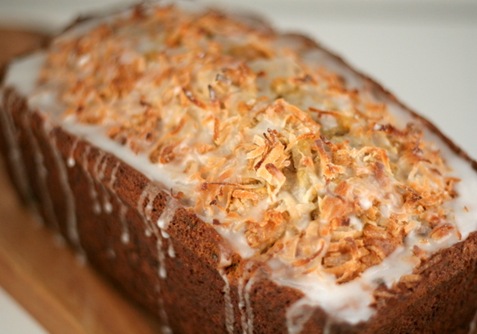
Coconut Banana Bread with lime glaze

coconut banana bread 1

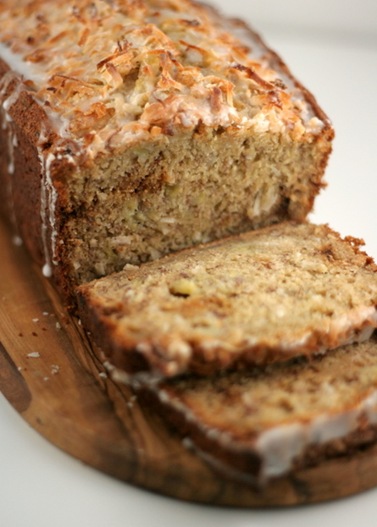
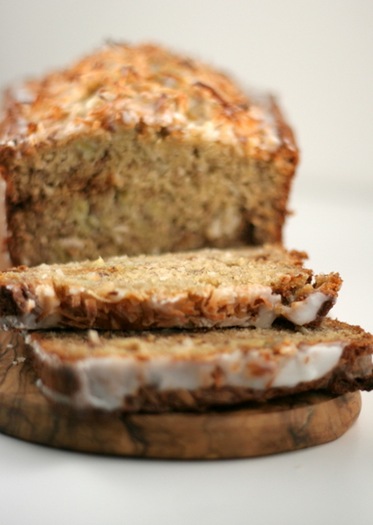
I have a tendency to buy too many bananas – and everyone knows the problem with bananas are that they are all under-ripe and then since you don’t eat all of them the day they are perfectly ripe the rest are over-ripe before you even get a chance to eat them.   I decided that this time I must make banana bread with them before fruit flies decided to infest my kitchen. 

banana coconut bread 3

This bread has coconut throughout and on the top and then its covered with a simple lime glaze.  The banana/coconut/lime combination make this the perfect tropical treat.   So enjoy and pretend you are someplace tropical and warm while you eat it!

banana coconut bread 2

Ingredients

  • 1 cup all-purpose flour
  • 1 cup whole wheat pastry flour
  • 3/4 tsp. baking soda
  • 1/2 tsp. salt
  • 1 cup sugar
  • 1/4 cup (4 Tbsp.) unsalted butter, softened
  • 2 large eggs
  • 3 mashed ripe bananas
  • 1/4 cup sour cream or plain yogurt
  • 3 Tbsp. milk
  • 1 tsp. vanilla extract
  • 1/2 cup coconut
  • Topping: 2 Tbsp. additional coconut
  • Glaze: 1/2 C powdered sugar whisked with 1 1/2 Tbsp. fresh lime juice

Directions

1. Preheat oven to 350 degrees.

2. Whisk flour, baking soda, and salt together and set aside.

3. In a large mixing bowl, beat butter and sugar until blended.  Add eggs and beat to combine.  Add banana, sour cream or yogurt, milk, and vanilla.  Beat until blended.

4. Add flour mixture and beat at a low speed until just combined.  Stir in 1/2 C coconut.

5. Pour batter into a 9×5″ loaf pan that has been sprayed with non-stick spray.  Sprinkle additional 2 Tbsp. coconut on top.

6. Bake in the oven for about 1 hour or until a knife or skewer inserted in center comes out clean. Check bread after about 40 minutes.  If the top has browned and the coconut pieces are looking toasty, cover top of bread lightly with a piece of foil.  Continue baking until done.

7. When done, remove pan from oven.  Let cool on a cooling rack for about 10 minutes and then carefully remove from pan.  Whisk powdered sugar and lime juice together for the glaze and then drizzle over top.  Cool for at least another 15 minutes before slicing.

Source: adapted from Our Best Bites

Printer-friendly version

Nov 17, 2011

Buttermilk Chocolate Cookies

chocolate buttermilk cookies 1

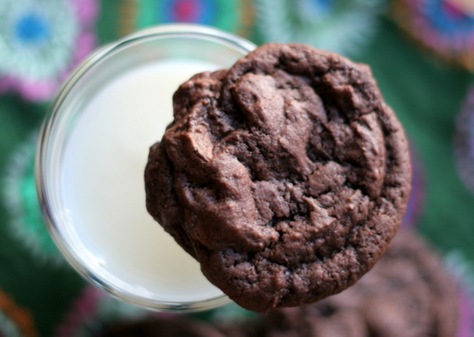
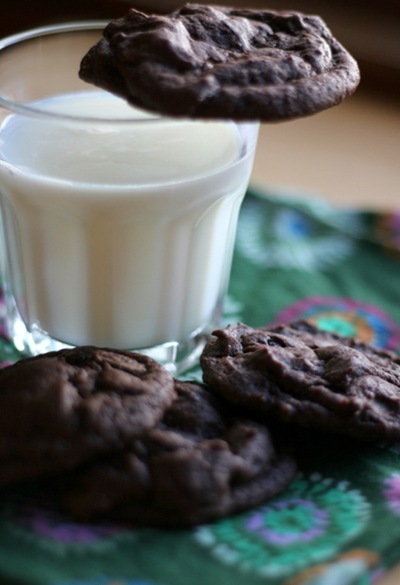
I had some buttermilk in my fridge – left over from making my favorite waffles – and I wanted to figure out what to do with it.   When I’m stressed or upset – I like to bake – it keeps me occupied and gives me time to think.  I should probably try to exercise more for the same reasons – but baking is much more fun (for me!) than exercising. 

chocolate buttermilk cookies 2

These cookies were so easy – sometimes I love a dessert that doesn’t require a mixer and can be easily mixed up in one bowl.  I recommend using good quality cocoa powder (I use Penzeys) and chocolate chips (Ghirardelli) – it makes a world of difference in something like this that has just a few ingredients.  The cookies turn out very soft – perfect with a glass of milk.  

chocolate buttermilk cookies 3

Ingredients

  • 1 cup all purpose flour
  • 1/4 tsp. baking soda
  • 1/4 tsp. salt
  • 1/4 cup (4 Tbsp.) unsalted butter
  • 1/4 cup plus 2 Tbsp. Dutch-process cocoa powder
  • 1 cup sugar
  • 1/2 tsp. vanilla extract
  • 1/3 cup buttermilk
  • 1 cup bittersweet chocolate chips

Directions

1. Preheat the oven to 350 F. Line a baking sheet with parchment paper or silicone liners.

2. In a medium bowl, whisk together flour, baking soda and salt.

3. Melt the butter in a small, microwave safe bowl.  In a large bowl, combine the melted butter with cocoa powder and whisk until smooth. Whisk in sugar, vanilla extract and buttermilk. Gradually stir in the flour mixture until no streaks of flour remain. Fold in the chocolate chips.

4. Drop dough in 1-inch balls into prepared baking sheet, leaving about two inches between cookies to allow for spread.

5. Bake for 10-12 minutes, until cookies are set around the edges.  Cool for 2-3 minutes on a baking sheet, then transfer to a wire rack with a spatula to cool completely.

Makes about 2 dozen cookies

Source: Baking Bites

Printer-friendly version