Apr 30, 2010

Thick and Chewy Chocolate Chip Cookies

It is no secret how much I love the recipes from Cook’s Illustrated – they are tested, tasted and re-tested to find the perfect recipe.  So, even though I have another chocolate chip cookie recipe that I love – I had to give this recipe a try.  Especially sine I have read so many rave reviews on this recipe on many blogs. 

Well – I now know why – I have found my new favorite chocolate chip cookie recipe!!!!  This is no joke -   it is the perfect cookie!!  

I also love how simple they are to whip up – you melt the butter – so no more remembering to bring your butter out to come to room temperature.   And you really don’t even need a mixer.   I used my favorite chocolate chips and toasted walnuts – this cookie is easily one of my new favorite desserts.  

I have come a long way in the world of chocolate chip cookies. When I first started baking (a long time ago!) I never had any luck with chocolate chip cookies – they were always flat and crispy.   And all I ever wanted was my cookies to be thick and chewy – and now they are :)   Thank you Cooks Illustrated – I love you even more than I already do!


Ingredients

  • 2 cups plus 2 tablespoons all-purpose flour
  • 1/2 teaspoon baking soda
  • 1/2 teaspoon salt
  • 3/4 cup (1 1/2 sticks) unsalted butter, melted and cooled until warm
  • 1 cup light brown sugar, firmly packed
  • 1/2 cup granulated sugar
  • 1 large egg
  • 1 large egg yolk
  • 2 teaspoons vanilla extract
  • 1 cup bittersweet chocolate chips
  • 1 cup walnuts, toasted and chopped (optional)

Directions

1. Adjust oven racks to upper-and lower-middle positions. Heat oven to 325°F. Line two large baking sheets with parchment paper.

2. Whisk flour, baking soda, and salt together in medium bowl; set aside.

3. Either by hand or with an electric mixer, mix butter and sugars until thoroughly blended. Beat in egg, yolk and vanilla until combined.

4. Add dry ingredients and beat at low speed just until combined. Stir in chips and nuts to taste.

5. Roll scant 1/4 cup dough into ball. Holding dough ball in fingertips of both hands, pull into two equal halves. Rotate halves ninety degrees and with jagged surfaces facing up, join halves together at their base, again forming a single ball, being careful not to smooth dough's uneven surface. Place formed dough onto cookie sheet, leaving 2 1/2-inches between each ball.

6. Bake, reversing position of cookie sheets halfway through baking, until cookies are light golden brown and outer edges start to harden yet centers are still soft and puffy, 15 to 18 minutes.

7. Cool cookies on sheets. When cooled, peel cookies from parchment.

Source: Cooks Illustrated

Printer-friendly version

Apr 29, 2010

Black Beans and Brown Rice

I was looking for some ways to use a bunch of cilantro I had on hand – and this recipe really appealed to me.  I definitely took awhile to cook because of the brown rice – but totally worth it in the end.   It was super flavorful and the corn provides a sweetness that really balances out the flavors.   It’s super healthy too – I spent the week before I made this out of town for work and after eating out every day for a week – this meal was almost like a detox from restaurant food.   

Ingredients
  • 4 tsp. olive oil
  • 1 cup onion, chopped fine
  • 1 red bell pepper, chopped fine
  • 3 cloves garlic, minced
  • 1 cup low-sodium chicken broth
  • 2 ¼ cups water
  • 1 ½ cups long-grain brown rice
  • 1 tsp. salt
  • 1 (15 oz.) cans black beans, drained and rinsed
  • 1 cup corn kernels (fresh from cob, or frozen and thawed)
  • ¼ cup chopped fresh cilantro
  • ¼ tsp. ground black pepper
Directions
1. Preheat the oven to 375° F.  Adjust an oven rack to the middle position. 
2. Heat the oil in a large Dutch oven over medium heat until shimmering.  Add the onion and bell pepper to the pan and cook, stirring occasionally, until well browned and tender, about 12-14 minutes.  Stir in the garlic and cook just until fragrant, about 30 seconds.
3. Add the chicken broth and water to the pan.  Bring the mixture to a boil.  Remove the pot from the heat, stir in the rice and salt, and cover.
4. Bake in the oven until the rice is tender, 65-70 minutes.
5. Remove the pot from the oven and uncover.  Fluff the rice with a fork, stir in the beans and corn, and replace the lid.  Let stand for 5 minutes.  Mix in the cilantro and black pepper.  Serve.
Source: Annie’s Eats who adapted from The Way the Cookie Crumbles, originally from Cook’s Illustrated
Printer-friendly version

Apr 28, 2010

Chicken Tequila Burgers

This is another easy (and different) weeknight burger recipe.  I enjoyed this recipe more than my husband did – but you can’t win them all!  Next time – will try these on the grill instead of the broiler.  I served them with some tortilla chips and salsa.  Enjoy!
 

Ingredients

  • 2 cloves garlic, minced
  • 1 jalapeno pepper, seeded and chopped
  • 1 lb. ground chicken
  • 3-4 tbsp. cilantro
  • Zest of ½ a lime
  • 1 oz. tequila
  • Dash of soy sauce
  • Kosher salt and ground black pepper
  • ½ cup panko bread crumbs

For serving

  • Burger buns
  • Sautéed bell pepper and onion
  • Lettuce

Directions
1. Preheat the broiler.  Line a baking sheet with foil and spray with with olive oil. 

2. Combine the garlic, jalapeno, ground chicken, cilantro and lime zest in the bowl of a medium bowl. Mix in the tequila, soy sauce, salt and pepper to taste, and panko until evenly mixed.

3. Form the mixture into 4-5 patties and place them on the prepared baking sheet.  Broil the burgers for about 12-15 minutes, flipping halfway through cooking to brown both side.

4. Serve on buns with sautéed bell pepper and onion, and lettuce as desired.

Source: adapted from Annie’s Eats

Printer-friendly version

Apr 27, 2010

Daring Bakers: Traditional British Pudding

The April 2010 Daring Bakers’ challenge was hosted by Esther of The Lilac Kitchen. She challenged everyone to make a traditional British pudding using, if possible, a very traditional British ingredient: suet.
Yes, that says suet – the thing you feed to the birds.  Luckily, Esther is very understanding for this months challenge – and gave us free reign to use what ever recipe we want – and if we can’t find suet – you can use a recipe that calls for butter.  
So that is what I had to do – I couldn’t bring myself to get some from the butchershop and render the fat, so I found a recipe that used butter :) 
I wanted to make a somewhat traditional version of a British pudding, and I’ve always wanted to try Sticky Toffee pudding – after I saw the Food Network show a few years ago –that turned it into a Haagen Dazs flavor.
There were a few things that made this challenging for me – on top of the fact that I never steamed a pudding before.  Most of the recipes I found used a lot of ingredients that are traditionally British.  Luckily, my grocery store has a small area with British foods.  That is where I found caster sugar and crème fraiche.  I was unable to find muscavado sugar – and I just substituted brown sugar. 
Also, the recipe I found – had all of the ingredients measured in grams.  After I spent awhile trying to convert the grams to cups – I realized that my food scale has a kg option.  So much simpler to just weigh out all of my ingredients!    I’ve always wished that the U.S. would switch to the metric system – and this recipe just reiterated that for me! 
For the steaming part – I used my large stockpot – with my vegetable steamer at the bottom.  I cooked my pudding in a 1.4 L pyrex bowl.  And it worked perfectly!    
Be sure to check out the other Daring Baker’s puddings – there is sure to be a huge variety of flavors and techniques on this challenge!   Thanks Esther for this month's challenge!

The recipe I chose was Apple steamed pudding with a sticky toffee sauce – it was absolutely delicious – and I’m so glad I chose it.
Ingredients (I am keeping the measurements in grams since I never figured out how to convert everything to cups anyway!)
  • 175 g unsalted butter, softened
  • 2 Granny smith apples peeled, cored and cut into small chunks
  • 130 g golden caster sugar
  • 50 g walnuts , toasted & roughly chopped
  • 3 eggs , beaten
  • 150 g self-raising flour
toffee sauce
  • 175g light muscovado sugar (I substituted light brown sugar)
  • 125g unsalted butter
  • 200g crème fraîche
Directions
1. Melt 25g butter in a large frying pan, add the apple chunks and cook until just tender and starting to turn golden. Add 1 tbsp sugar and continue to cook for a couple of minutes until the apples start to caramelize. Cool and add the walnuts.
2. To make the toffee sauce, combine all of the ingredients into a saucepan and cook until the butter and crème fraîché have melted. Bring to the boil and simmer for 2 minutes.
3. Add the apple and walnut mixture into a buttered 1.5 liter pudding basin. Pour a third of the toffee sauce over the apple mixture, set aside.
4. Beat together the remaining butter and caster sugar until pale and creamy.
5. Gradually add the beaten eggs one at a time, mixing well between each addition. Fold in the flour with a pinch of salt.
6. Carefully spoon the mixture on top of the apples and spread level. Cover with a pleated sheet of baking parchment and foil, tie securely with string and trim off any excess paper and foil. Put the bowl in a large saucepan and pour boiling water around the bowl so that it comes halfway up the sides.
7. Cover with a lid and steam for 1 1/2 to 2 hours on low heat, adding more water to the pan halfway though if needed.
8. Rest the pudding for 2 minutes before turning out onto a dish and serving with the remaining warm toffee sauce.
Source: adapted from BBC Goodfood – Olive Magazine March 2007
Printer-friendly version

Apr 26, 2010

Chicken Fajitas

If you love cilantro and want an authentic tasting chicken fajita – this is your recipe.  I love that you marinate the chicken and use some reserved marinade on it after grilling to really bring out the flavors.   I cooked the chicken on my indoor grill pan – but you can also use your outdoor grill.  I topped mine with my favorite guacamole – this is easily one of my all time favorite meals. 
 

Ingredients

  • 1/3 cup lime juice (from 2 to 3 limes)
  • 6 tablespoons vegetable oil
  • 3 medium cloves garlic , minced
  • 1 tablespoon Worcestershire sauce
  • 1 1/2 teaspoons brown sugar
  • 1 jalapeño chile , seeds and ribs removed, minced
  • 1 1/2 tablespoons minced fresh cilantro leaves
  • 3 boneless, skinless chicken breasts (about 1 1/2 pounds), pounded to 1/2-inch thickness
  • 1 large red onion (about 14 ounces), peeled and cut into 1/2-inch-thick rounds (do not separate rings)
  • 2 large red or yellow bell peppers (about 10 ounces), quartered, stemmed, and seeded
  • 6-inch flour tortillas

Directions

1. In medium bowl, whisk together lime juice, 4 tablespoons oil, garlic, Worcestershire, brown sugar, jalapeño, cilantro, 1 teaspoon salt, and 3/4 teaspoon pepper. Reserve 1/4 cup marinade in small bowl; set aside. Add another teaspoon salt to remaining marinade. Place chicken in marinade; cover with plastic wrap and refrigerate 15 minutes.

2. Adjust one oven rack to upper-middle position (about 8 inches from heating element) and second rack to lower-middle position; heat broiler.

3. Brush both sides of onion rounds and peppers with 2 tablespoons oil and season with salt and pepper. Arrange onion rounds and peppers (skin sides up) in single layer on rimmed baking sheet.

4. Wrap the number of tortillas you need securely in a foil packet.

5. Remove chicken from marinade and pat dry with paper towels; discard marinade. Heat remaining 2 teaspoons oil in 12-inch nonstick or cast-iron skillet over medium-high heat until just beginning to smoke. Swirl oil to coat skillet, then arrange chicken smooth side down in skillet in single layer; cook without moving chicken, until well browned, about 3 minutes. Using tongs, flip chicken; continue to cook until second sides are well browned, about 2 minutes. Reduce heat to medium and continue to cook, turning chicken once or twice, until chicken is no longer pink when cut into with paring knife or instant-read thermometer inserted in thickest part registers 160 degrees, 3 to 5 minutes longer. Transfer chicken to large plate and let rest 5 minutes.

6. While chicken is cooking, place baking sheet with vegetables in oven on upper rack; place tortilla packets on lower rack. Broil vegetables until spottily charred and peppers are crisp-tender, 6 to 8 minutes. Using tongs, transfer peppers to cutting board. Flip onion rounds and continue to broil until charred and tender, 2 to 4 minutes longer. Turn off broiler and remove vegetables, leaving tortillas in oven until needed.

7. Separate onions into rings and place in medium bowl; slice bell peppers lengthwise into 1/4-inch strips and place in bowl with onions. Add 2 tablespoons reserved unused marinade to vegetables and toss well to combine. Slice chicken into 1/4-inch strips and toss with remaining 2 tablespoons reserved marinade in separate bowl; arrange chicken and vegetables on large platter and serve with warmed tortillas.

Source: Cook’s Illustrated

Printer-friendly version

Apr 23, 2010

Triple Chocolate Mousse Cake

 
I have been wanting to make this cake forever!  Luckily, I had to make a birthday cake for three people, so I thought this was perfect – one layer for each :)  Happy Birthday Pat, Mike and Nicole


It does not get much better than a dark chocolate flourless chocolate cake, topped with a layer of chocolate mousse and then topped with a white chocolate mousse.   And don’t forget the chocolate shavings on top!   This is the kind of dessert that reminds me of something you would get at a restaurant.   I used the (unscented) dental floss trick to cut the slices perfectly. 
Ingredients
Bottom Layer
  • 6 tablespoons (3/4 stick) unsalted butter , cut into 6 pieces
  • 7 ounces bittersweet chocolate , chopped fine
  • 3/4 teaspoon instant espresso powder
  • 1 1/2 teaspoons vanilla extract
  • 4 large eggs , separated
  • Pinch table salt
  • 1/3 cup packed light brown sugar
Middle Layer
  • 2 tablespoons cocoa powder , preferably Dutch-processed
  • 5 tablespoons hot water
  • 7 ounces bittersweet chocolate , chopped fine
  • 1 1/2 cups cold heavy cream
  • 1 tablespoon granulated sugar
  • 1/8 teaspoon table salt
Top Layer
  • 3/4 teaspoon powdered gelatin
  • 1 tablespoon water
  • 6 ounces white chocolate chips
  • 1 1/2 cups cold heavy cream
  • Shaved chocolate or cocoa powder for serving, optional
Directions
1. Bottom Layer: Adjust oven rack to middle position and heat oven to 325 degrees. Butter bottom and sides of 9 1/2-inch springform pan.  Melt butter, chocolate, and espresso powder in large heatproof bowl set over saucepan filled with 1 inch of barely simmering water, stirring occasionally until smooth. Remove from heat and cool mixture slightly, about 5 minutes. Whisk in vanilla and egg yolks; set aside.
2. In stand mixer fitted with whisk attachment, beat egg whites and salt at medium speed until frothy, about 30 seconds. Add half of brown sugar and beat until combined, about 15 seconds. Add remaining brown sugar and beat at high speed until soft peaks form when whisk is lifted, about 1 minute longer, scraping down sides halfway through. Using whisk, fold one-third of beaten egg whites into chocolate mixture to lighten. Using rubber spatula, fold in remaining egg whites until no white streaks remain. Carefully transfer batter to prepared springform pan, gently smoothing top with offset spatula.
3. Bake until cake has risen, is firm around edges, and center has just set but is still soft (center of cake will spring back after pressing gently with finger), 13 to 18 minutes. Transfer cake to wire rack to cool completely, about 1 hour. (Cake will collapse as it cools.) Do not remove cake from pan.
4. Middle Layer: Combine cocoa powder and hot water in small bowl; set aside. Melt chocolate in large heatproof bowl set over saucepan filled with 1 inch of barely simmering water, stirring occasionally until smooth. Remove from heat and cool slightly, 2 to 5 minutes.
5. In clean bowl of stand mixer fitted with whisk attachment, whip cream, granulated sugar, and salt at medium speed until mixture begins to thicken, about 30 seconds. Increase speed to high and whip until soft peaks form when whisk is lifted, 15 to 60 seconds.
6. Whisk cocoa powder mixture into melted chocolate until smooth. Using whisk, fold one-third of whipped cream into chocolate mixture to lighten. Using rubber spatula, fold in remaining whipped cream until no white streaks remain. Spoon mousse into springform pan over cooled cake and gently tap pan on counter 3 times to remove any large air bubbles; gently smooth top with offset spatula. Wipe inside edge of pan with damp cloth to remove any drips. Refrigerate cake at least 15 minutes while preparing top layer.
7. Top Layer: In small bowl, sprinkle gelatin over water; let stand at least 5 minutes. Place white chocolate in medium bowl. Bring ½ cup cream to simmer in small saucepan over medium-high heat. Remove from heat; add gelatin mixture and stir until fully dissolved. Pour cream mixture over white chocolate and whisk until chocolate is melted and mixture is smooth, about 30 seconds. Cool to room temperature, stirring occasionally, 5 to 8 minutes (mixture will thicken slightly).
8. In clean bowl of stand mixer fitted with whisk attachment, whip remaining cup cream at medium speed until it begins to thicken, about 30 seconds. Increase speed to high and whip until soft peaks form when whisk is lifted, 15 to 60 seconds. Using whisk, fold one-third of whipped cream into white chocolate mixture to lighten. Using rubber spatula, fold remaining whipped cream into white chocolate mixture until no white streaks remain. Spoon white chocolate mousse into pan over middle layer. Smooth top with offset spatula. Return cake to refrigerator and chill until set, at least 2½ hours.
9. To serve: If using, garnish top of cake with chocolate curls or dust with cocoa. Run thin knife between cake and side of springform pan; remove side of pan. Run cleaned knife along outside of cake to smooth sides. Cut into slices and serve.

Source: Cook’s Illustrated
Printer-friendly version

Apr 21, 2010

Focaccia


I love homemade bread!   Focaccia is super simple to make – if you have patience to wait for it since it takes two days.  We had this with our ravioli and pesto sauce – but we also had an awesome turkey sandwich with the leftovers.  [It was turkey, pesto, sundried tomatoes, baby spinach and mozzarella cheese pressed like a Panini – so yummy]  I topped this with some extra toasted pine nuts – but the variety of toppings are almost endless – this makes for a great pizza type crust as well. 
 

Ingredients

  • 5 cups unbleached bread flour
  • 2 tsp. salt
  • 2 tsp. instant yeast
  • 6 tbsp. olive oil
  • 2 cups water, at room temperature
  • ¼ to ½ cup herb oil (I had an Italian herb oil I had bought – you can also make your own)

Directions

1. Stir together the flour, salt and yeast in the bowl of an electric mixer.

2. Add the oil and water and mix on low speed with the paddle attachment until the ingredients form a wet, sticky ball.

3. Switch to the dough hook and mix on medium speed for 5-7 minutes, or as long as it takes to create a smooth, sticky dough. The dough should clear the sides of the bowl but stick to the bottom of the bowl. (You may need to add additional flour to firm up the dough enough to clear the sides of the bowl, but the dough should still be quite soft and sticky.)

4. Sprinkle enough flour on the counter to make a bed about 6 inches square. Using a scraper or spatula dipped in water, transfer the sticky dough to the bed of flour and dust liberally with flour, patting the dough into a rectangle. Wait 5 minutes for the dough to relax.

5. Coat your hands with flour and stretch the dough from each end to twice its size. Fold it, letter style, over itself to return it to a rectangular shape. Mist the top of the dough with spray oil, again dust with flour and cover loosely with plastic wrap.

6. Let rest for 30 minutes. Stretch and fold the dough again; mist with spray oil, dust with flour and cover. After 30 minutes, repeat this one more time.

7. Allow the covered dough to ferment on the counter for 1 hour. It should swell but not necessarily double in size.

8. Line a 17×12” sheet pan with baking parchment and proceed with the shaping and panning the dough as follows:

Drizzle ¼ cup of olive oil over the paper and spread it with your hands or a brush to cover the entire surface. Lightly oil your hands and using a plastic or metal pastry scraper, lift the dough off the counter and transfer it to the sheet pan, maintaining the rectangular shape as much as possible.

Spoon half of the herb oil over the dough. Use your fingertips to dimple the dough and spread it simultaneously. Do not use the flat of your hands – only the fingertips – to avoid tearing or ripping the dough. Try to keep the thickness as uniform as possible across the surface. Dimpling allows you to de-gas only part of the dough while preserving gas in the non-dimpled sections. If the dough becomes too springy, let it rest for about 15 minutes and then continue dimpling. Don’t worry if you are unable to fill the pan 100 percent, especially the corners. As the dough relaxes and proofs, it will spread out naturally. Use more herb oil as needed to ensure that the entire surface is coated in oil.

9. Loosely cover the pan with plastic wrap and refrigerate the dough overnight (or for up to 3 days).

10. Remove the pan from the refrigerator 3 hours before baking. Drizzle additional herb oil over the surface and dimple it in. This should allow you to fill the pan completely with the dough a thickness of about ½-inch. Add any other pre-proof toppings desired. Again, cover the pan with plastic and proof the dough at room temperature for 3 hours, or until the dough doubles in size, rising to a thickness of nearly 1-inch.

11. Preheat the oven to 500° with the oven rack on the middle shelf. Gently place any pre-bake toppings on the dough.

12. Place the pan in the oven. Lower the oven setting to 450° and bake for 10 minutes. Rotate the pan 180 degrees and continue baking the focaccia for 5-10 minutes, or until it begins to turn a light golden brown. If you are using any during-baking toppings, sprinkle them on at this point and continue baking an additional 5 minutes or so. The internal temperature of the dough should register 200° (measured in the center).

13. Remove the pan from the oven and immediately transfer the focaccia out of the pan onto a cooling rack.

14. Allow the focaccia to cool for at least 20 minutes before slicing and serving.


Source: The Bread Baker’s Apprentice by Peter Reinhart

Printer-friendly Version

Apr 20, 2010

Pesto

Pesto is one of my very favorite things to make – it is quick, easy and delicious.  I can’t wait until summer – when I have an abundance of basil in my garden and we make this even more often.   I was the perfect sauce for my four cheese ravioli too. 
Ingredients
  • 1/4 cup pine nuts
  • 3 medium cloves garlic , unpeeled
  • 2 cups packed fresh basil leaves
  • 7 tablespoons extra-virgin olive oil
  • Salt
  • 1/4 cup finely grated Parmesan cheese
  • Ground black pepper
Directions
1. Toast the nuts in a small, heavy skillet over medium heat, stirring frequently, until just golden and fragrant, about 5 minutes; set aside.
2. Add the garlic to the empty skillet and toast over medium heat, shaking the pan occasionally, until fragrant and the color of the cloves deepens slightly, about 7 minutes. Let the garlic cool slightly, then peel, and chop.
3. Place the basil in a heavy-duty 1-gallon zipper-lock plastic bag. Pound the bag with the flat side of a meat pounder or rolling pin until all the leaves are bruised.
4. Process the nuts, garlic, herbs, oil, and 1⁄2 teaspoon salt in a food processor until smooth, stopping as necessary to scrape down the sides of the bowl, about 1 minute. Stir in the Parmesan and season with salt and pepper to taste.
Source: Cooks Illustrated
Printer-friendly version

Apr 19, 2010

Four Cheese Ravioli

 
For my husbands birthday a few weeks ago – I wanted to make a special completely homemade dinner – and I had a lot of fun with it.  It included these heart shaped ravioli, pesto, focaccia, brownie pudding and ice cream

These ravioli were surprisingly easy to put together – but I am not going to lie – it definitely took awhile to make the pasta, roll it out and cut out all of the hearts. 

But in the end – it was delicious and worth it – I would definitely make this recipe again!

Ingredients

  • ½ cup part-skim ricotta cheese
  • ½ cup shredded mozzarella cheese
  • ½ cup shredded fontina cheese
  • ½ cup shredded parmesan cheese
  • 1 clove garlic, finely minced
  • ¼ tsp. dried oregano
  • ¼ tsp. dried basil
  • ¼ tsp. dried parsley
  • ¼ tsp. salt
  • Freshly ground black pepper, to taste
  • 1 batch fresh homemade pasta

Directions

1. In a medium mixing bowl, combine the ricotta, mozzarella, fontina, parmesan, garlic, and spices.  Mix well to blend and set aside. 

2. Roll out homemade pasta into long, thin sheets.  To make heart-shaped ravioli, use a heart-shaped cookie cutter to cut out pasta shapes. 

3. Place about 2 teaspoons of filling in the middle of  half of the heart shapes, leaving a clear edge around the perimeter. 

4. Dip a finger in water and lightly brush around the edges of a heart topped with the filling.  Place one of the remaining pasta hearts on top and press the edges of the pasta shapes together to seal around the filling, being careful to press out any excess air.  Repeat with the remaining dough shapes.

5. Bring a large pot of salted water to boil.  Cook the ravioli until al dente, about 5 minutes. 

Source: Annie’s Eats who adapted it from Good Things Catered

Printer-friendly version

Apr 16, 2010

Brownie Pudding


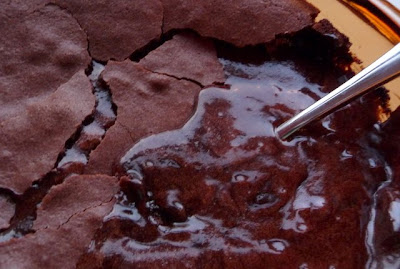
I know what you are thinking - what is that amazing deliciousness I see in these photos? – It is one of the easiest, most decadent desserts I’ve ever made.   It is similar to a molten lava cake, but it is also similar to homemade hot fudge.  You have to serve this with some homemade vanilla ice cream (I used this recipe), to balance out the rich chocolate flavor and the cold ice cream is perfect with the warm pudding.  I also used some Dutch process cocoa powder – and I think it really helped with the intense chocolate flavor in this dish.  I am so excited that we finally got a Penzeys in Buffalo – so I can actually find items like this! 
I served this immediately after making it – but with the leftovers we reheated for 30 seconds in the microwave and it was just as good as when it was first made. Enjoy!
 

Ingredients

  • ½ lb. (2 sticks) unsalted butter
  • 4 large eggs, at room temperature
  • 2 cups sugar
  • ¾ cup cocoa powder (I used Dutch process)
  • ½ cup all-purpose flour
  • 1 vanilla bean, split lengthwise

Directions
1. Preheat the oven to 325˚ F. 

2. Lightly butter a 2-quart oval baking dish (using the butter wrappers).  Melt the 2 sticks of butter in the microwave and set aside to cool.

3. In the bowl of an electric mixer fitted with the paddle attachment, combine the eggs and sugar.  Beat together on medium-high speed until thick and light yellow in color. 

4. Meanwhile, combine the flour and cocoa powder in a medium bowl and whisk together until blended.

5. When the eggs and sugar are finished mixing, scrape the seeds from the vanilla bean into the mixing bowl. 

6. Add the flour-cocoa powder mixture to the bowl as well.  Mix on low speed just until combined.  With the mixer still on low, slowly pour the melted butter and mix again just until combined.

7. Pour the mixture into the prepared baking dish.  Place the baking dish in a larger baking pan.  Add very hot tap water to the outer baking pan to create a water bath, coming halfway up the side of the baking dish. 

8. Bake for 60 minutes.  The center will appear very under-baked, that is the way the dessert should be.  Allow to cool slightly before serving with ice cream.

Source: seen on Annie’s Eat’s,  who adapted it from Barefoot Contessa Back to Basics by Ina Garten

printer-friendly version

Apr 14, 2010

Crockpot Rice Pilaf

This is a super easy way to make brown rice – and its delicious at that.  I served this with some grilled asparagus and steak for a perfect meal.  Enjoy!
 

Ingredients

  • 4 tbsp. unsalted butter
  • 6 garlic cloves, crushed
  • 2 cups long grain brown rice
  • 5 cups chicken broth, divided
  • 1 tsp. salt
  • 1 tsp. pepper

Directions

1.  Melt butter in a saucepan, add rice and garlic, saute until golden brown.

2. Add 2 cups of chicken broth and bring to a boil.

3. Place into crock pot, with remaining 3 cups of broth.

4. Cook on high, 2 - 3 hours.

Source: Recipezaar

Printer-friendly version

Apr 12, 2010

Blackened Chicken

This was the first meal this year made on my grill (I love it!) and dined on in our outdoor sunroom!  I love the warmer weather – and last week we had a nice taste of summer.  It is often not in the 80’s in April in Buffalo!  So made the best of it and cooked out for a few meals – luckily there was still propane in my grill.  I’ve actually never had to re-fill it since I got the grill last year – I better check on that.  It would really suck to run out of gas in the middle of cooking!
Ingredients
  • 1/2 tsp. paprika
  • 1/8 tsp. salt
  • 1/8 tsp. ground pepper
  • 1/4 tsp. cayenne pepper
  • 1/4 tsp. cumin
  • 1/4 tsp. thyme
  • 1/8 tsp. onion powder
  • 1/8 tsp. garlic powder
  • 1 tsp. cajun seasoning
  • 2 tsp. canola oil
  • 2 boneless/skinless chicken breast halves
Directions
1. Heat your cast iron skillet or grill until it’s very hot. 
2. Mix together the all of the herbs/spices in a small bowl.
3. Rub 1 tsp. of oil into each piece of chicken, and then press the spice mixture into both sides.
4. Place the chicken breasts in the skillet or grill. Cook about 5 minutes per side, or until chicken is cooked through.
Source: adapted from Elly Says Opa
Printer-friendly version

Apr 7, 2010

Double Chocolate Butterscotch Muffins

If you can’t tell already from reading my blog - I really love to bake.  And if you are also a baker you know – sometimes you just get the urge to bake and absolutely nothing you can do will stop you.  After I saw this recipe on one of my very favorite cooking websites (the kitchn), I had to make them that very same night.   Especially since I already had all of the ingredients I needed in my kitchen.  My gut instinct was right – they muffins were absolutely delicious.  I am still thinking about them – and I want to make them again soon – they are a perfect way to start your morning off right!


Ingredients

  • 1/2 cup (1 stick) unsalted butter
  • 1 3/4 cups all-purpose flour
  • 1/2 cup + 2 tablespoons cocoa powder
  • 1 1/4 cups dark brown sugar
  • 1 1/4 teaspoon baking powder
  • 1 teaspoon baking soda
  • 1 teaspoon salt
  • 2 large eggs
  • 1 cup milk
  • 2 tablespoons vanilla extract
  • 2 teaspoons white vinegar
  • 3/4 cup chocolate chips
  • 3/4 cup butterscotch chips

Directions

1.  Preheat oven to 425 degrees F and line muffin cups (I had enough batter for 16 muffins) with papers liners.

2.  Melt butter in a small microwaveable bowl and allow to sit and cool slightly while you combine the other ingredients.

3.  Mix all the dry ingredients in a mixing bowl. Stir with a wire whisk to combine, breaking up any extra-large clumps of brown sugar.

4.  Combine wet ingredients in a small bowl (including melted butter), adding vinegar last. Stir quickly to combine and add to dry mixture. Stir mixture with a wooden spoon until the wet and dry ingredients come together.

5.  Add in the chocolate and butterscotch chips and stir to distribute. Using a large cookie scoop, divide batter between the 16 muffin cups.

6.  Bake for 17 minutes until tops of muffins lose their shine and a toothpick in the center comes out clean.

Source: the Kitchn

Printer-friendly version

Apr 6, 2010

Lemon Ricotta Cookies

If you like lemon and a soft, cake-y cookie then these are the perfect for you!  The flavors are perfect way to celebrate Spring!
I served these at work recently – and several coworkers were raving about them.  I may have had a few of these for lunch that day – hey, they do have ricotta cheese, so they are healthy – yeah, I’ll convince myself to believe that!  :) Definitely don’t be put off by the ‘ricotta’ cheese, it’s definitely there for the texture and not the taste. 

Ingredients

for the cookies:

  • 2 1/2 cups all-purpose flour
  • 1 tsp. baking powder
  • 1 tsp. salt
  • 1/2 cup unsalted butter, softened
  • 2 cups sugar
  • 2 eggs
  • 1 (15 oz.) container ricotta cheese
  • 3 tbsp. fresh squeezed lemon juice
  • zest of one lemon

for the glaze:

  • 1 1/2 cups powdered sugar
  • 3 tbsp. lemon juice
  • zest of one lemon

Directions
1. Preheat the oven to 375 degrees F.  Line two baking sheets with parchment paper.

2. In a medium bowl, combine the flour, baking powder, and salt.

3. In the bowl of an electric mixer beat the butter and sugar on medium-high speed until light and fluffy, 2-3 minutes. 

4. Add the eggs one at a time and mix well to incorporate, scraping down the bowl between additions. 

5. Add the ricotta cheese, the lemon juice, and lemon zest.  Mix to combine. 

6. Add in the dry ingredients and mix on low speed just until incorporated.

7. Spoon the dough onto the baking sheets (about 2 tablespoons per cookie).  Bake for 15 minutes one tray at a time, until slightly golden at the edges.  Remove from the oven and let the cookies rest on the baking sheet for 10 minutes.  Transfer to a wire rack to cool completely.

8. To make the glaze, in a small bowl combine the powdered sugar, lemon juice and lemon zest.  Whisk until smooth.  Spoon a small amount of glaze onto each cookie and spread gently using the back of the spoon.  Let the cookies sit to allow the glaze to harden, about 2 hours.  Store in an airtight container in a single layer.

Source: Annie’s Eats, originally from Food Network

Printer-friendly version

Apr 5, 2010

Microwave Potato Chips


As I alluded to in my Buffalo Chicken Sloppy Joe post – I served that sandwich with some ‘homemade’ potato chips.   These chips are truly revolutionary – they are made in the microwave, they are super simple to make and they taste fantastic.  It is truly unbelievable!   You would have no idea that they are not deep fried.   Definitely so much healthier then any other way of making potato chips! It never even occurred to me to even attempt to make my own chips until I saw this recipe.  I was definitely intrigued and since I had some russet potatoes – it was worth a shot trying.   I’ve already made them again – they are that good.   You must try these! 

Ingredients

  • 2 large russet potatoes, scrubbed clean with the skin left on
  • ¼ cup olive oil
  • Salt or seasoned salt

Directions

1. Using a mandolin or food processor, slice the potato into thin slices; about 1/16 of an inch. [This is very important – you will likely not get a thin enough slice if you try to use a knife]

2. In a bowl, toss the potatoes with olive and sprinkle on salt or seasoning.

3. Arrange the potatoes in a single layer on a microwave safe plate.

4. Working in batches, microwave the potatoes on high for 5-7 minutes [depending on the power of your microwave]. Keep a close eye on the potatoes, since they can burn if cooked for too long.  The finished potato chip should be golden brown and crisp.

5. Carefully transfer to a serving dish and let rest for 2 minutes until cool enough to eat. More salt or seasoning can be added as soon as they are removed from the microwave.

Source: Norfolk Cooking Examiner

Printer-friendly version

Apr 2, 2010

Buffalo Chicken Sloppy Joes

This is a great way to mix up your weeknight routine – who doesn’t love good ole sloppy joes.  Except these are really over the top – with the addition of celery, carrots and Frank’s Hot Sauce – topped with real blue cheese crumbles – they were delicious.  Sure to become a favorite in your house!  
And just wait until I tell you what I served with them (hint: sneak peek in the upper left corner of this photo) :)
 

Ingredients

  • 1 tbsp. extra virgin olive oil
  • 1 pound ground chicken
  • 1 small carrot, peeled and chopped
  • 1 stalk celery, chopped
  • 1 small yellow onion, finely chopped
  • 2 garlic cloves, minced
  • salt and pepper
  • 1 tbsp. red wine vinegar
  • 1 tbsp. brown sugar
  • 2 tsp. Worcestershire sauce
  • 3 tbsp. hot sauce (such as Frank's Red Hot)
  • 1/2 cup tomato sauce
  • 1/4 cup chicken stock
  • 4 good quality burger rolls, split and toasted
  • 1/2 cup blue cheese crumbles


Directions

1. Heat the olive oil in a large skillet over medium-high heat.

2. Add the meat and cook until browned.

3. Add in carrot, celery, onion and garlic; season with salt and pepper. Cook 7 to 8 minutes more.

4. In a small bowl, combine the vinegar, brown sugar, Worcestershire, hot sauce, tomato sauce and chicken stock. Pour into the pan and stir to combine all ingredients. Simmer for a few minutes until the mixture thickens up.

5. Place filling on the prepared buns and top with blue cheese.

Source: adapted from Taste and Tell, originally from Rachael Ray

Printer-friendly version

Apr 1, 2010

Chicken Chili

I better post this recipe since the warm weather is fast approaching – 75 degrees in Buffalo this weekend!  Yeah – finally!  I cannot wait to finally open the windows and get some fresh air in the house!  So it’s best that you bookmark this one for next fall, because I sense that some grilling recipes are coming soon and chili season is over!  But this chili would be worth the wait – it was the perfect blend of spices and seasonings.  Definitely going to be added to my chili repertoire!

Ingredients

  • 2 boneless, skinless chicken breasts
  • Salt and pepper
  • 4 cups chopped yellow onion (2-3 onions)
  • 2 tbsp. olive oil
  • 2 cloves garlic, minced
  • 3 bell peppers
  • 2 tsp. chili powder
  • 2 tsp. ground cumin
  • ¼ tsp. red pepper flakes
  • ½ tsp. cayenne pepper
  • ½ tsp. dried oregano
  • 1 chipotle chili in adobo sauce, finely diced
  • 2 tsp. kosher salt
  • 2 (28 oz.) cans whole peeled tomatoes in puree, not drained
  • 2 (15 oz.) cans beans, drained and rinsed (I used 1 can black and 1 can pinto beans)

Directions
1. Preheat the oven to 375 degrees F.  Line a baking sheet with foil.  Place the chicken breasts on the foil, and season with salt and pepper.  Fold the foil over the chicken breasts to make a “packet”.  Roast 30-40 minutes, or until the chicken is cooked through (about 165 degrees internal temp).  Allow to cool enough to handle, then shred or chop into bite-sized pieces.

2. Heat the olive oil in a large stockpot or Dutch oven over medium-high heat. 

3. Sauté the onions 10-15 minutes, or until tender and translucent. 

4. Add the garlic to the pot and sauté just until fragrant, about 1 minute. 

5. Mix in the chopped bell peppers, chili powder, cumin, red pepper flakes, cayenne, oregano, chipotle, and kosher salt.  Cook 5 more minutes. 

6. Using clean kitchen shears, cut the tomatoes in the open can roughly.  Add the tomatoes with the puree to the pot and bring the mixture to a boil.  Reduce to a simmer and cook for 30 minutes, uncovered, stirring occasionally.

7. Stir in the shredded chicken and the beans, and allow to simmer for another 20 minutes.

Source: Seen on Annie’s Eats who adapted from Pink Parsley Catering, originally from Barefoot Contessa Parties by Ina Garten

Printer-friendly version